
Altitude Tool - Content Generation
A. How to get to Altitude Tool - Content Generation?
| 1. Click on the SEO Tools menu from the side navigation. | 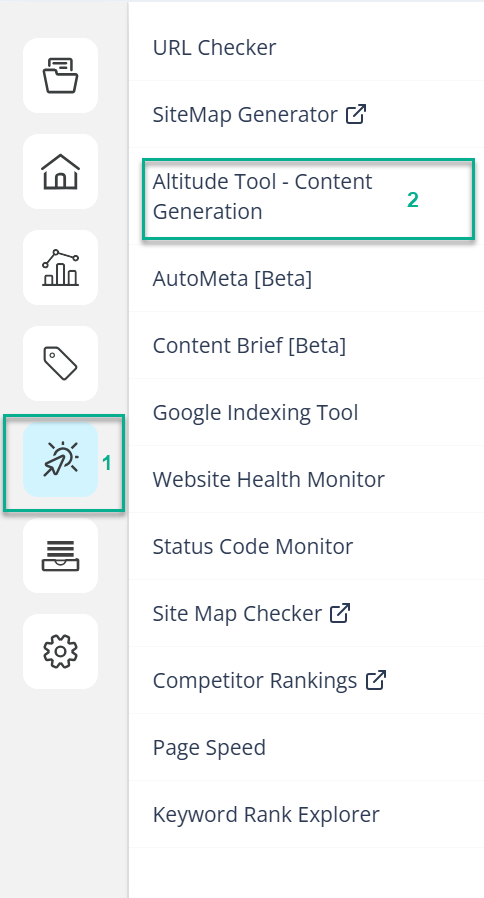 |
| 2. Click on Altitude Tool - Content Generation menu item. |
Now, we have been redirected to Altitude Tool - Content Generation page.
B. How the Altitude Tool - Content Generation works?
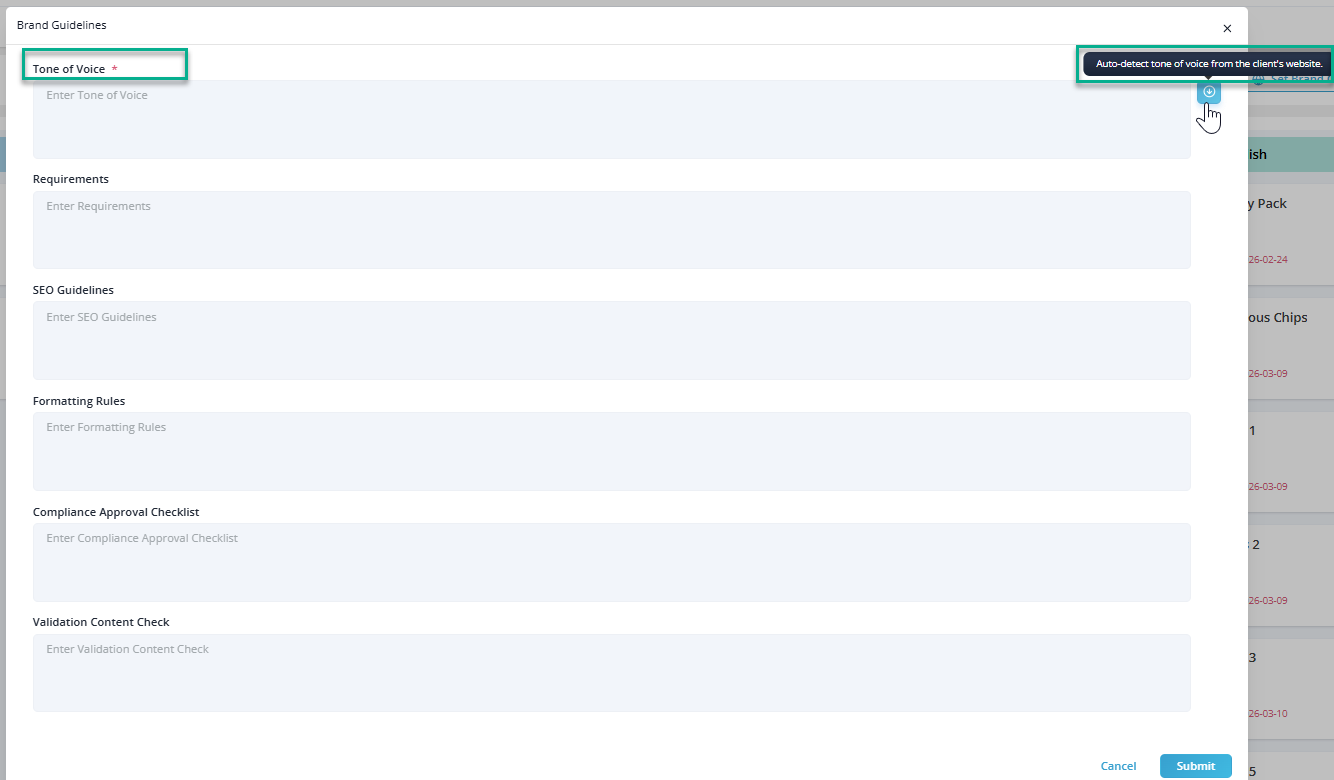
First of all, we must set brand tone clicking "Set Brand Guidelines".

As it can be manually filled or the system can Auto detect tone of voice from the client's website by clicking on the button on right side as provided. Selecting Auto-detect tone of voice from the client's website analyzes the client's website and automatically populates the Tone of Voice field based on the detected writing style.
Brand Guidelines
Brand Guidelines define the writing standards and content requirements used during content generation. These settings help ensure that generated content aligns with the client's brand, SEO requirements, and compliance standards.
Tone of Voice *
Define the preferred writing style and personality for the content.
The tone can be entered manually or automatically detected from the client's website by selecting Auto-detect tone of voice from the client's website.
Examples:
- Professional
- Conversational
- Informative
- Friendly
Requirements
Specify any content requirements or instructions that should be considered during content generation.
Examples:
- Mention key product benefits.
- Use Australian English.
- Avoid technical jargon.
SEO Guidelines
Define SEO-related requirements that should be followed when generating content.
Examples:
- Prioritize primary keywords.
- Use descriptive headings.
- Maintain natural keyword placement.
- Optimize for search intent.
Formatting Rules
Specify how the content should be structured and formatted.
Examples:
- Use H2 and H3 headings.
- Keep paragraphs concise.
- Use bullet points where appropriate.
- Limit sentence length.
Compliance Approval Checklist
Define compliance requirements that must be satisfied before content approval.
Examples:
- Ensure claims are factually accurate.
- Follow brand and legal guidelines.
- Verify mandatory disclaimers are included.
Validation Content Check
Specify validation criteria used to review generated content.
Examples:
- Check grammar and readability.
- Verify keyword coverage.
- Confirm internal links are present.
- Ensure the content matches the target audience.
After setting up Brand Guidelines, we must click "Create New Content" button which will give a popup regarding creating New Project.

Creating a Content Page
Selecting Add opens the Create Content Page dialog, which provides three methods for creating content projects:
- Start From Scratch
- Use Existing Content Brief
- Create Optimised Content
Each option supports a different content creation workflow depending on the available inputs and desired outcome.
Start From Scratch

Use this option to create a new content project from the beginning.
Content Page Name *
Specify a name for the content project.
Due Date
Select the target completion date for the project.
Once the required information has been provided, select Create to create the content page.
Use Existing Content Brief
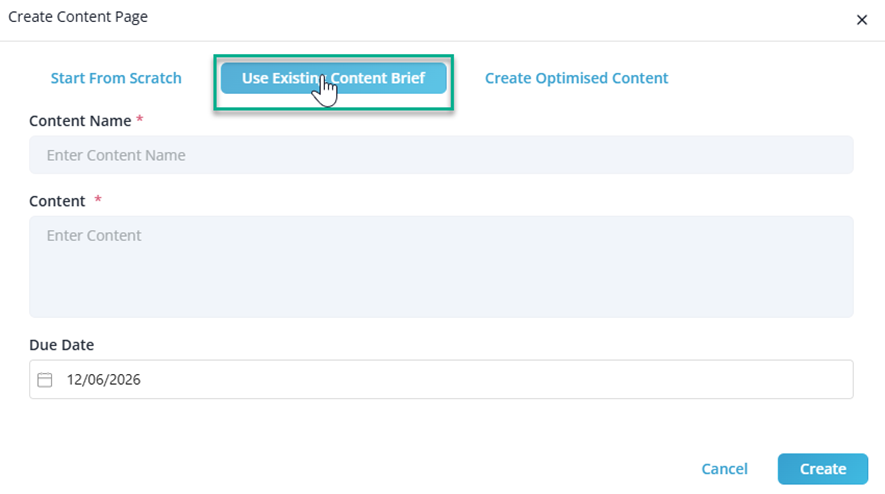
Use this option when an existing content brief is available and will serve as the basis for content generation.
Content Name *
Specify a name for the content project.
Content *
Provide the content brief that should be used during content generation.
Due Date
Select the target completion date for the project.
After completing the required fields, select Create to create the content page.
Create Optimised Content
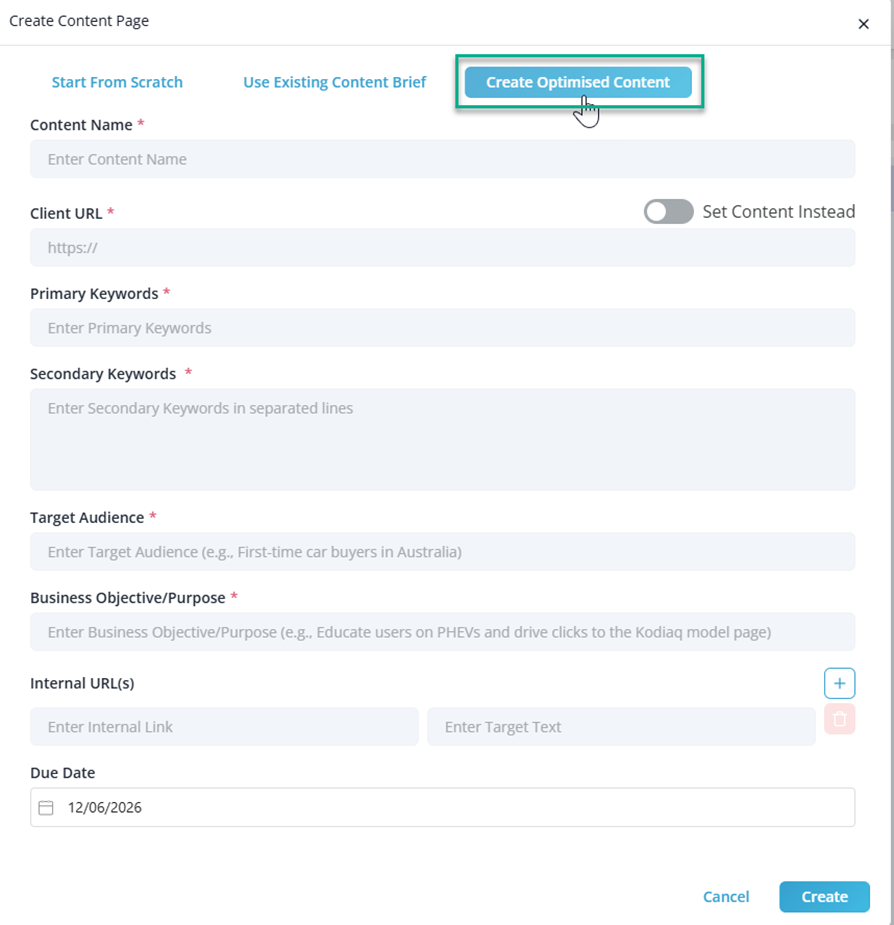
Use this option to generate content based on keywords, audience requirements, and business objectives.
Content Name *
Specify a name for the content project.
Client URL *
Enter the client's website URL.
Set Content Instead
Enable this option to provide content directly instead of using the client URL as the source.
Primary Keywords *
Specify the primary keywords that the content should target.
Secondary Keywords *
Provide supporting keywords to improve topic coverage and relevance. Enter each keyword on a separate line.
Target Audience *
Describe the intended audience for the content.
Example:
- First-time car buyers in Australia
Business Objective/Purpose *
Define the primary objective of the content.
Example:
- Educate users on PHEVs and drive traffic to the Kodiaq model page.
Internal URL(s)
Add internal links together with their corresponding target text to strengthen the internal linking structure.
Additional links can be added using the + button.
Due Date
Select the target completion date for the project.
After completing the required fields, select Create to create the content page and begin the content optimization process.
Set Page Structure
Note: Please use this option, if you want your content for a certain Page type to follow a tentative set structure
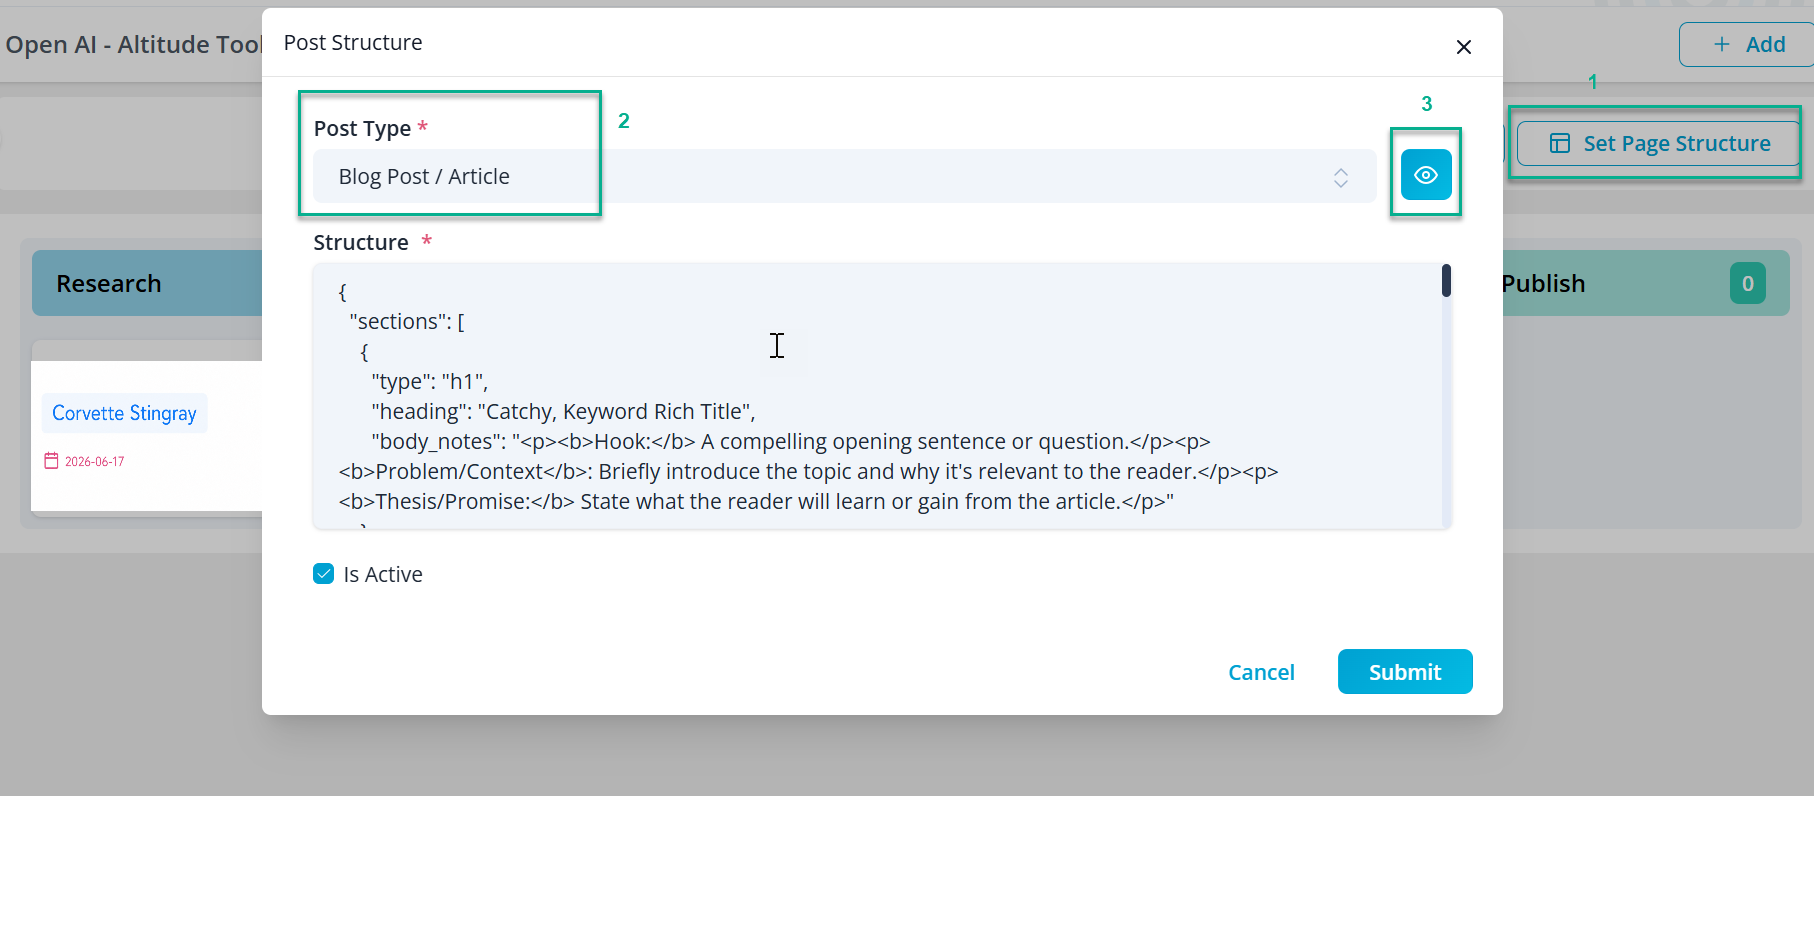
Once the necessary details are provided, the page structure for the generated content can be configured. Clicking on ‘Set Page Structure’ opens a pop-up window for customization.

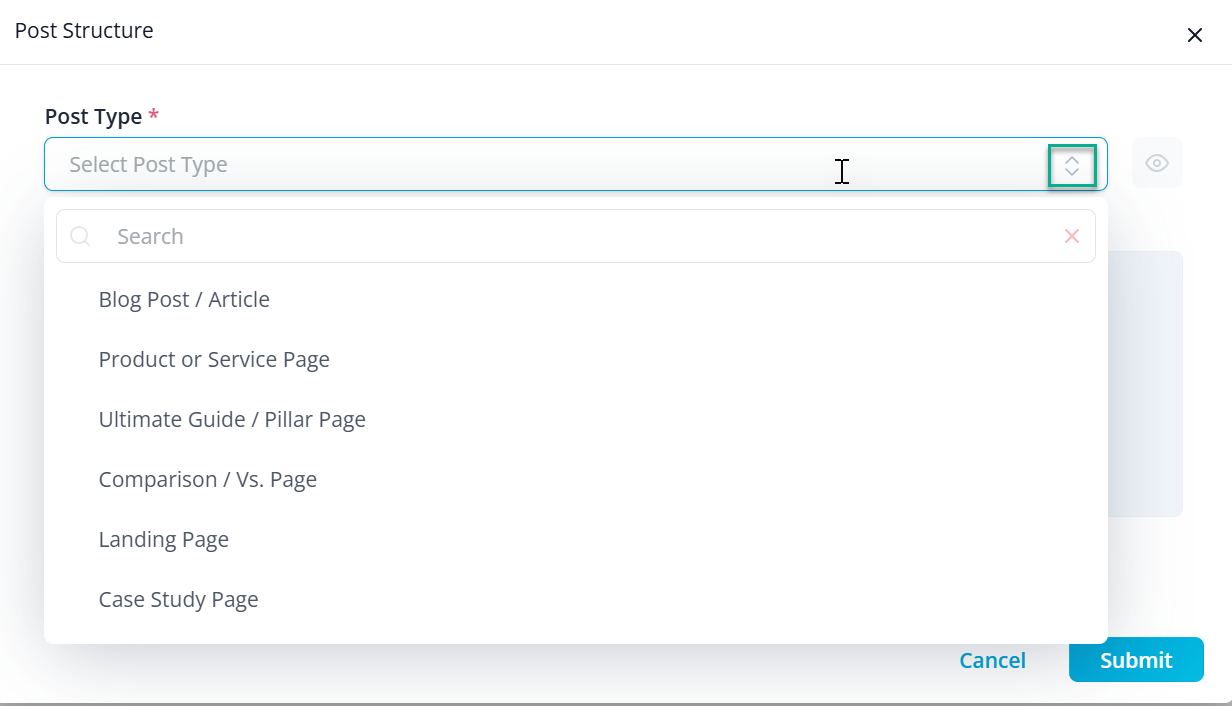
After a window appears,
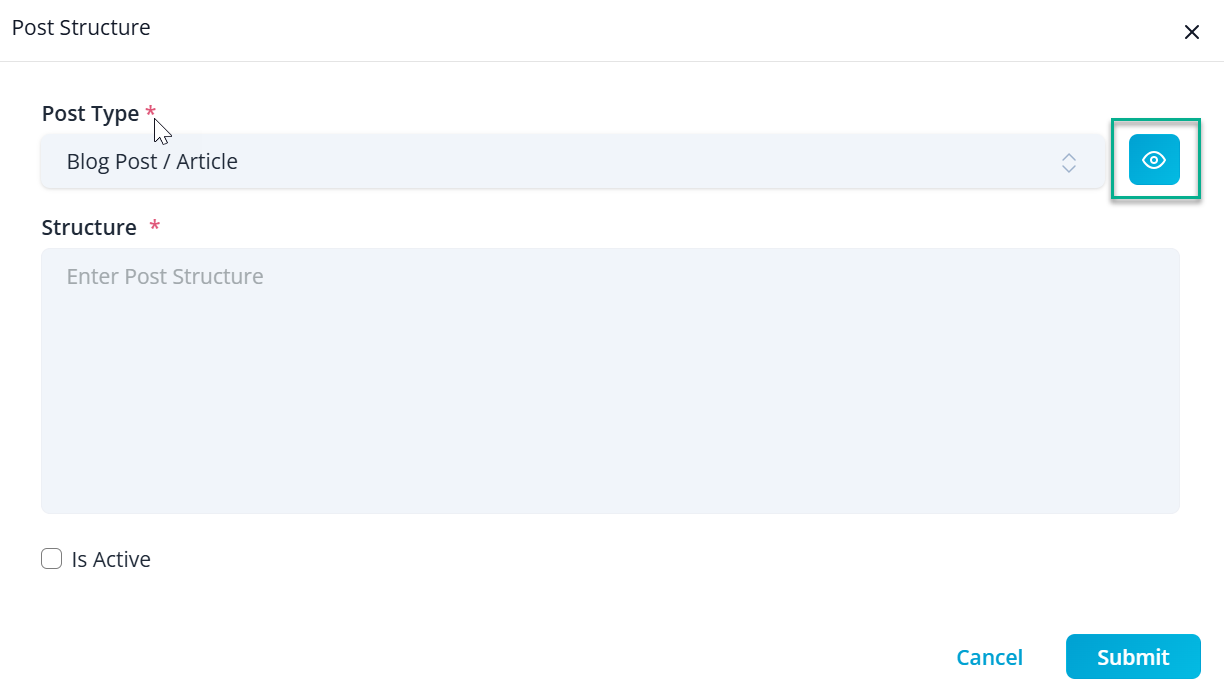
- We must choose Post Type from the dropdown as listed.
- After choosing post type, we can view structure of the dedicated post type by clicking "Eye" icon.
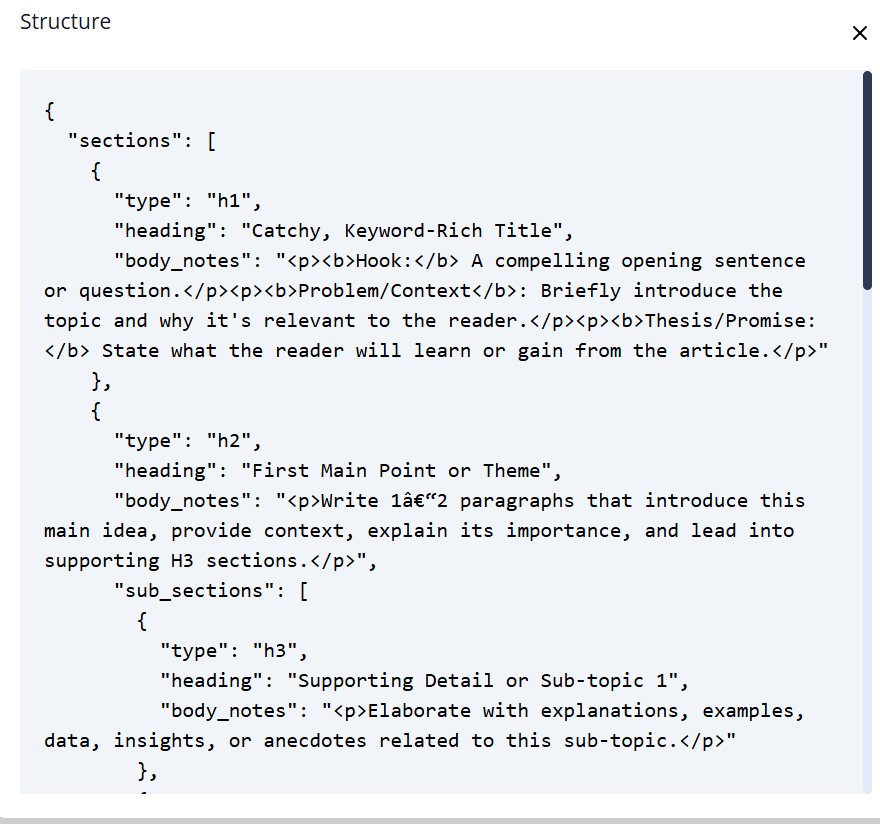
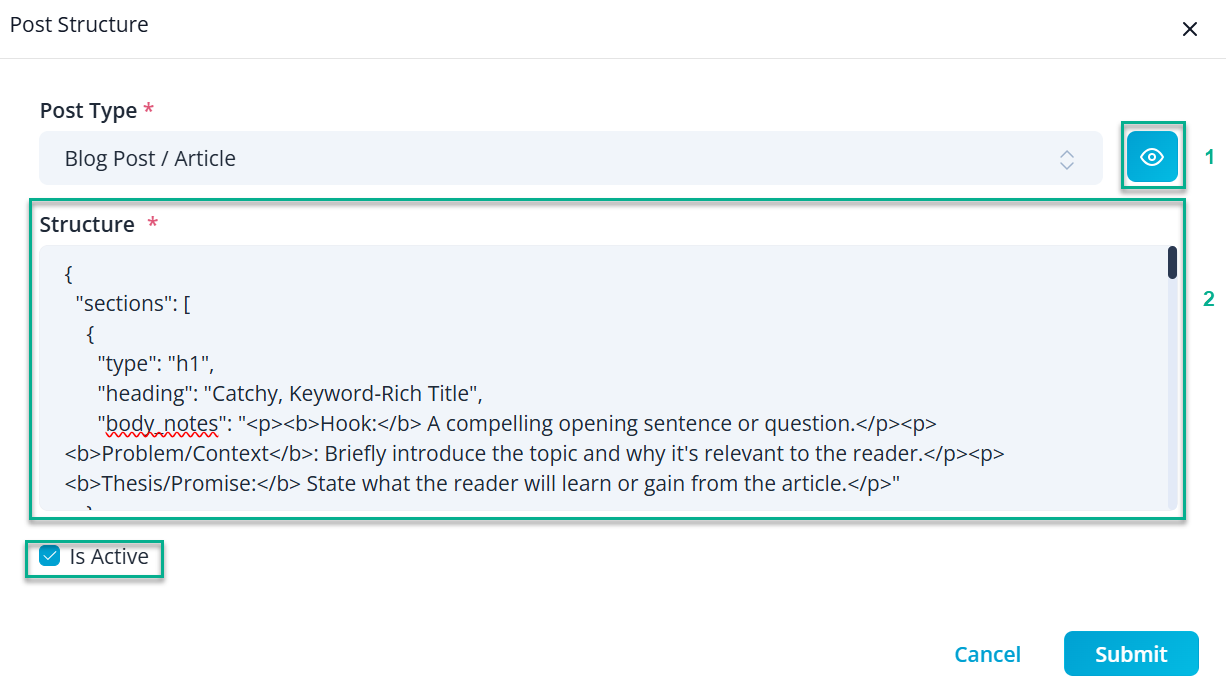
3. View the Post Structure being displayed by viewing the structure. We can use the structure and modify them to match your need.
4. Click the checkbox regarding the content as it is active or not. If the checkbox is unchecked and saved, it will use dynamic default global structure.
C. Altitude Tool - Content Generation-Step-by-Step Explanation
Note:
All used field are example
This content generation tool is designed to make the whole process simple and organized.
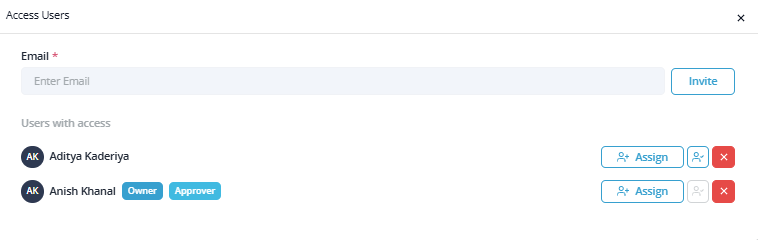
It starts with, inviting multiple people within project assigned client or profile if required.
1. Research & Discovery
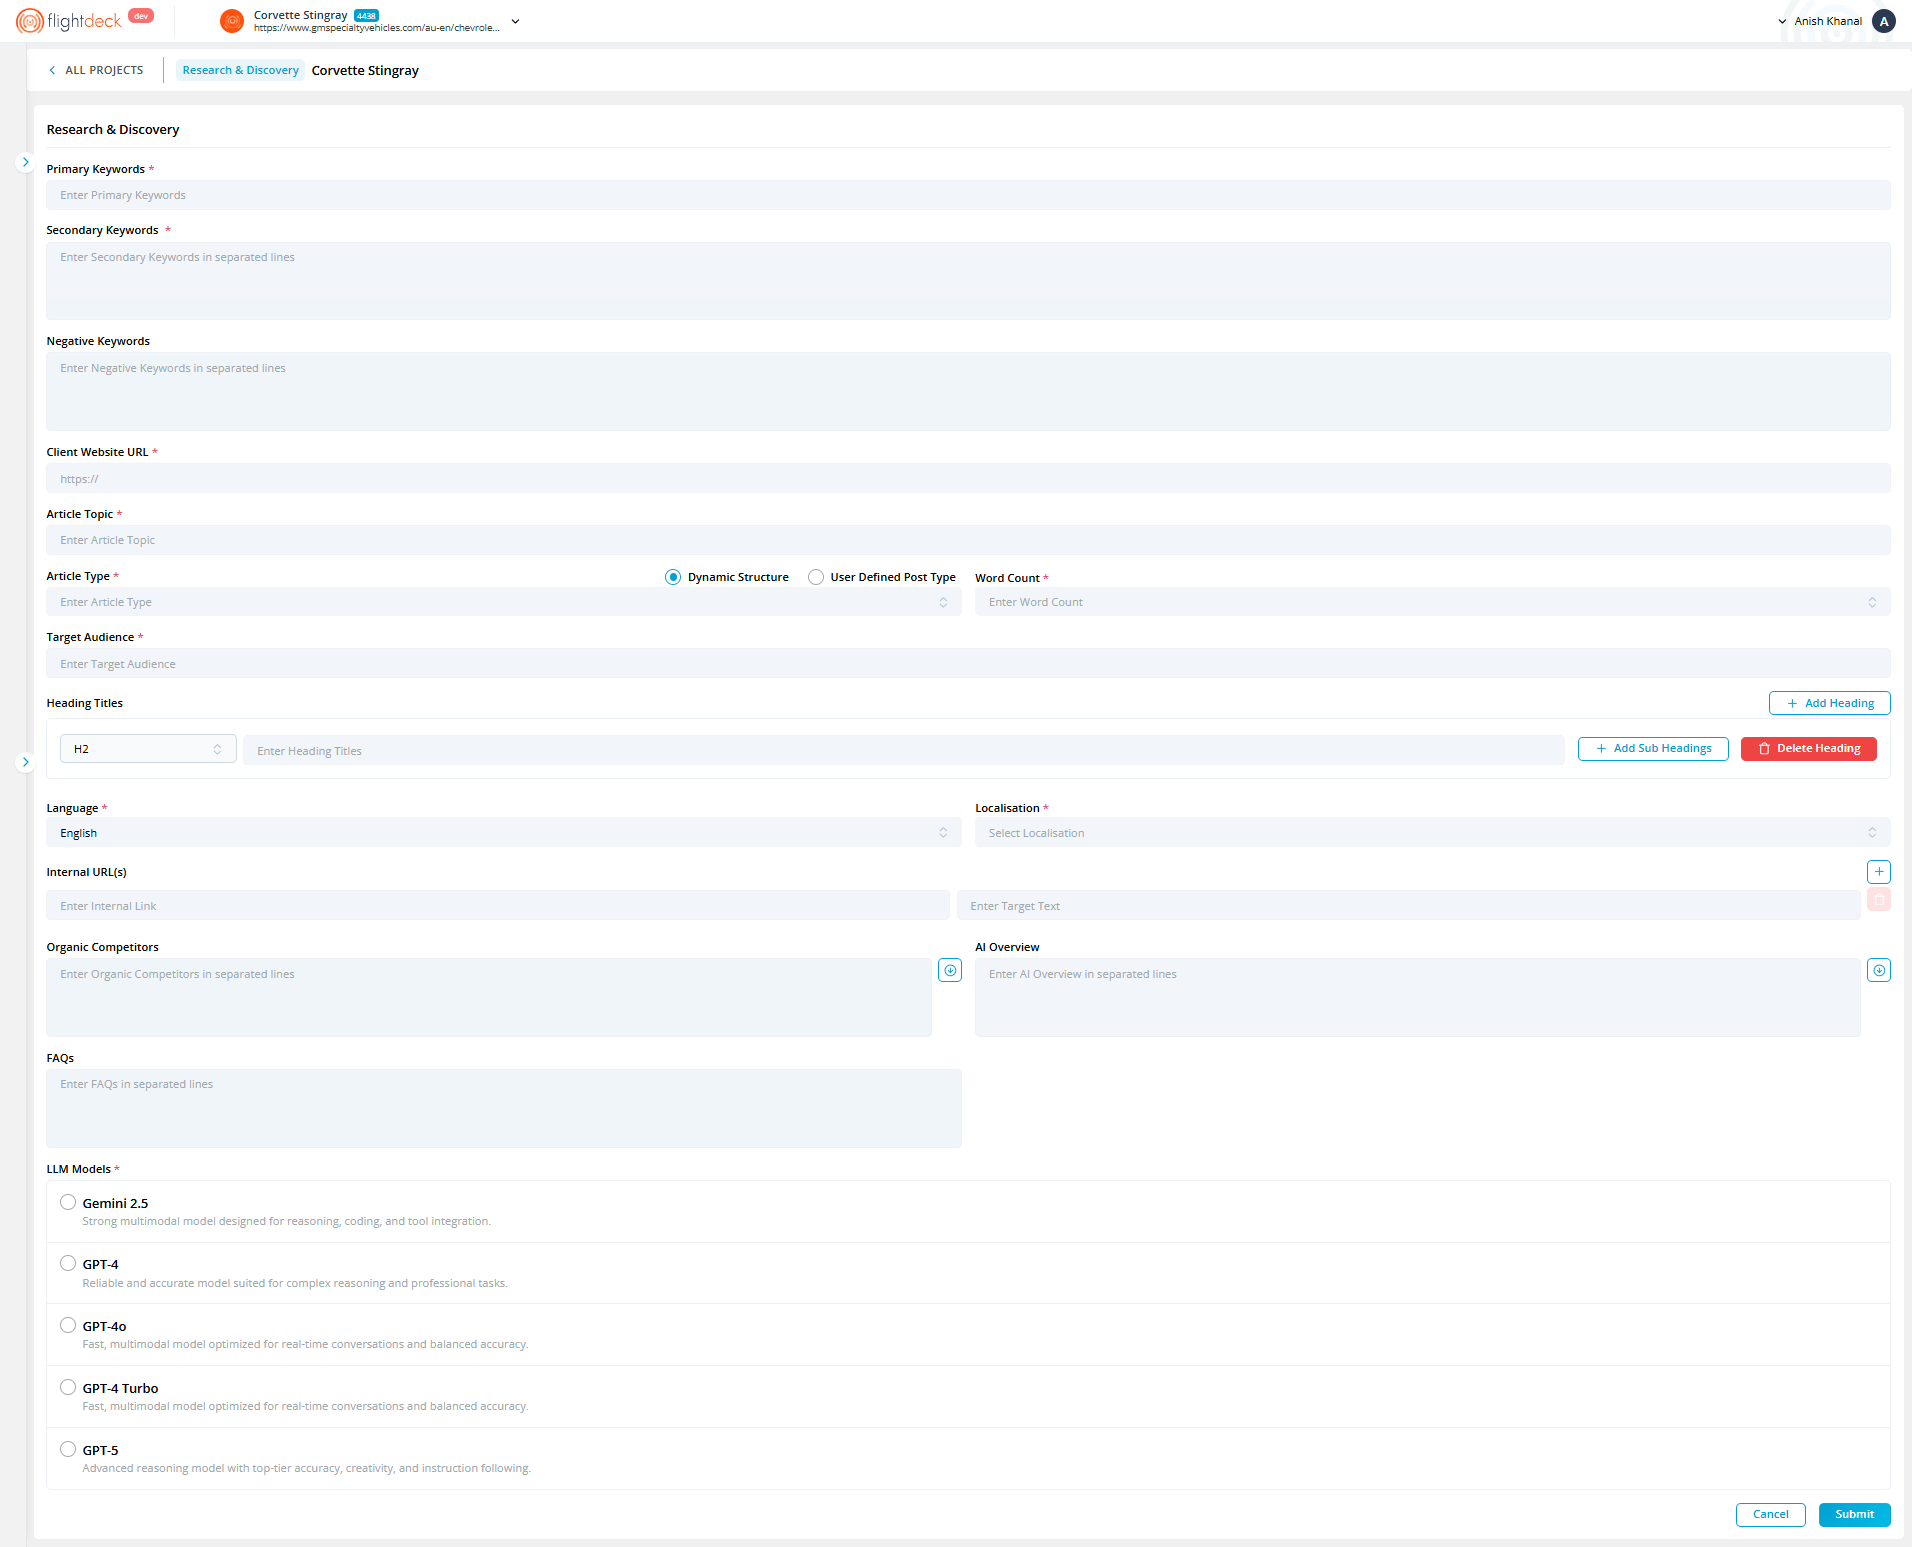
1.1 Primary Keywords *
After inviting, we do start by entering the main keyword as we want the article to be focused on. It should clearly reflect the core topic of the content.
Example:
Corvette Stingray
1.2 Secondary Keywords *
Add related or supporting keywords that complement the primary keyword.
Enter each keyword on a new line. These help the content cover the topic more comprehensively and improve search visibility.
Example:
- Corvette Stingray price Australia
- Corvette Stingray specs
- Corvette Stingray 0 to 100 km/h
- Corvette Stingray Z51 package
- Corvette Stingray coupe
1.3 Negative Keywords
Use this field to specify any keywords or topics we don't want the article to target.
This is optional, but helpful when we want to keep the content focused.
Example:
- Cheap
- Free
1.4 Client Website URL *
Enter the official website of the client.
Make sure the URL is complete and begins with https://.
Example:
https://www.gmspecialtyvehicles.com/au-en/chevrolet/corvette
1.5 Article Topic *
Provide a clear and descriptive topic for the article. This helps define the overall direction of the content.
Example:
- Fast Corvette Stingray
1.6 Article Type *
We can select the desired article format from the dropdown. We configure the article structure in the "Dashboard" using Set Page Structure for each Post Type.
In the Research section, Dynamic Structure is selected by default. With this option enabled, the system generates the article structure using the dynamic default global structure. Alternatively, selecting User Defined Post Type allows the system to fetch and apply the structure configured in the Post Structure settings for that particular post type.
This Is Active checkbox determines whether the content structure is active. If the checkbox is unchecked and saved, the system will use the dynamic default global structure.

1.7 Word Count *
Enter the approximate length of the article in words choosing from dropdown as per requirement.
Example :
- Long-form Content: 1,500 to 3,000+ words
- Medium-length Content: 800 to 1,200 words
- Short-form Content: 300 to 500 words
1.8 Target Audience *
Describe who the content is meant for.
Example:
Performance-focused drivers in Australia seeking information on Corvette Stingray specifications, pricing, and availability..
1.9 Heading Titles
The Heading Titles section allows article structures to be defined using headings and subheadings.
Select Add Heading to create a new section within the article. For each heading, choose the appropriate heading level and provide a heading title.
Subsections can be created by selecting Add Sub Headings, allowing related topics to be grouped under a parent heading. Existing headings can be removed using Delete Heading.
Defining a heading structure helps improve content organization and readability and provides additional guidance during content generation.
1.10 Language *
Choose the language in which the article should be written.
Example:
English
1.11 Localization *
Select the geographical market the content is intended for.
This ensures the language, references, and tone are relevant to the audience.
Examples:
Australia, United States, United Kingdom
1.12 Internal Links
Internal links can be added to embed the generated content toward other relevant target text. By entering an Internal URL along with the corresponding Target Text, the system automatically inserts the link within the generated content using the specified anchor text. This helps strengthen the internal linking structure.

1.13 Organic Competitors
Add the names or website URLs of competitors who are ranking for similar topics. As it can be manually filled or the button on right side can auto detects top 3 Competitors from primary keywords.

This helps with competitive content analysis.
Example:
https://en.wikipedia.org/wiki/Fast_Car
https://open.spotify.com/track/2M9ro2krNb7nr7HSprkEgo
https://www.about-tracy-chapman.net/tracy-chapman-fast-car-meaning-fast-car-lyrics-fast-car-videos/
1.14 AI Overview
Add overview topics or prompts that should be considered during content generation.
Enter each item on a separate line. Alternatively, select Auto Populate AI Overview to automatically generate overview suggestions based on the primary keyword.
This helps improve content coverage and provides additional context during content generation.
1.15 FAQs
List frequently asked questions related to the topic.
Enter one question per line. These may be used to enhance the article and improve search visibility.
Example:
What is the Corvette Stingray's 0 to 100 km/h time?
→ The Corvette Stingray can accelerate from 0 to 100 km/h in approximately 3.4 seconds when equipped with the Z51 Performance Package.
What engine does the Corvette Stingray use?
→ The Corvette Stingray is powered by a naturally aspirated 6.2L LT2 V8 engine.
Is the Corvette Stingray available in Australia?
→ Yes, the Corvette Stingray is available in Australia through GMSV.
1.16 LLM Models *
Select the AI model we want to use for content generation:
Gemini 2.5
Strong multimodal model designed for reasoning, coding, and tool integration.
GPT-4
Reliable and accurate model suited for complex reasoning and professional tasks.
GPT-4o
Fast, multimodal model optimized for real-time conversations and balanced accuracy.
GPT-4 Turbo
Fast, multimodal model optimized for real-time conversations and balanced accuracy.
GPT-5
Advanced reasoning model with top-tier accuracy, creativity, and instruction following.
1.17 Submitting the Form
- Once all fields are filled:
- Review inputs for accuracy
- Click Submit to proceed
- Click Cancel if we want to discard our changes.
After submitting it will be in queue to process on background.

Note:
While being queued, in background DEVGAI API will fetch the data generated by LLM as per selected.
While processing its status will be gradually change as it processes automatically.
2. Brief
Upon completion of Research and Discovery process, it will get shifted to Brief section where briefly generated content and related details are displayed.
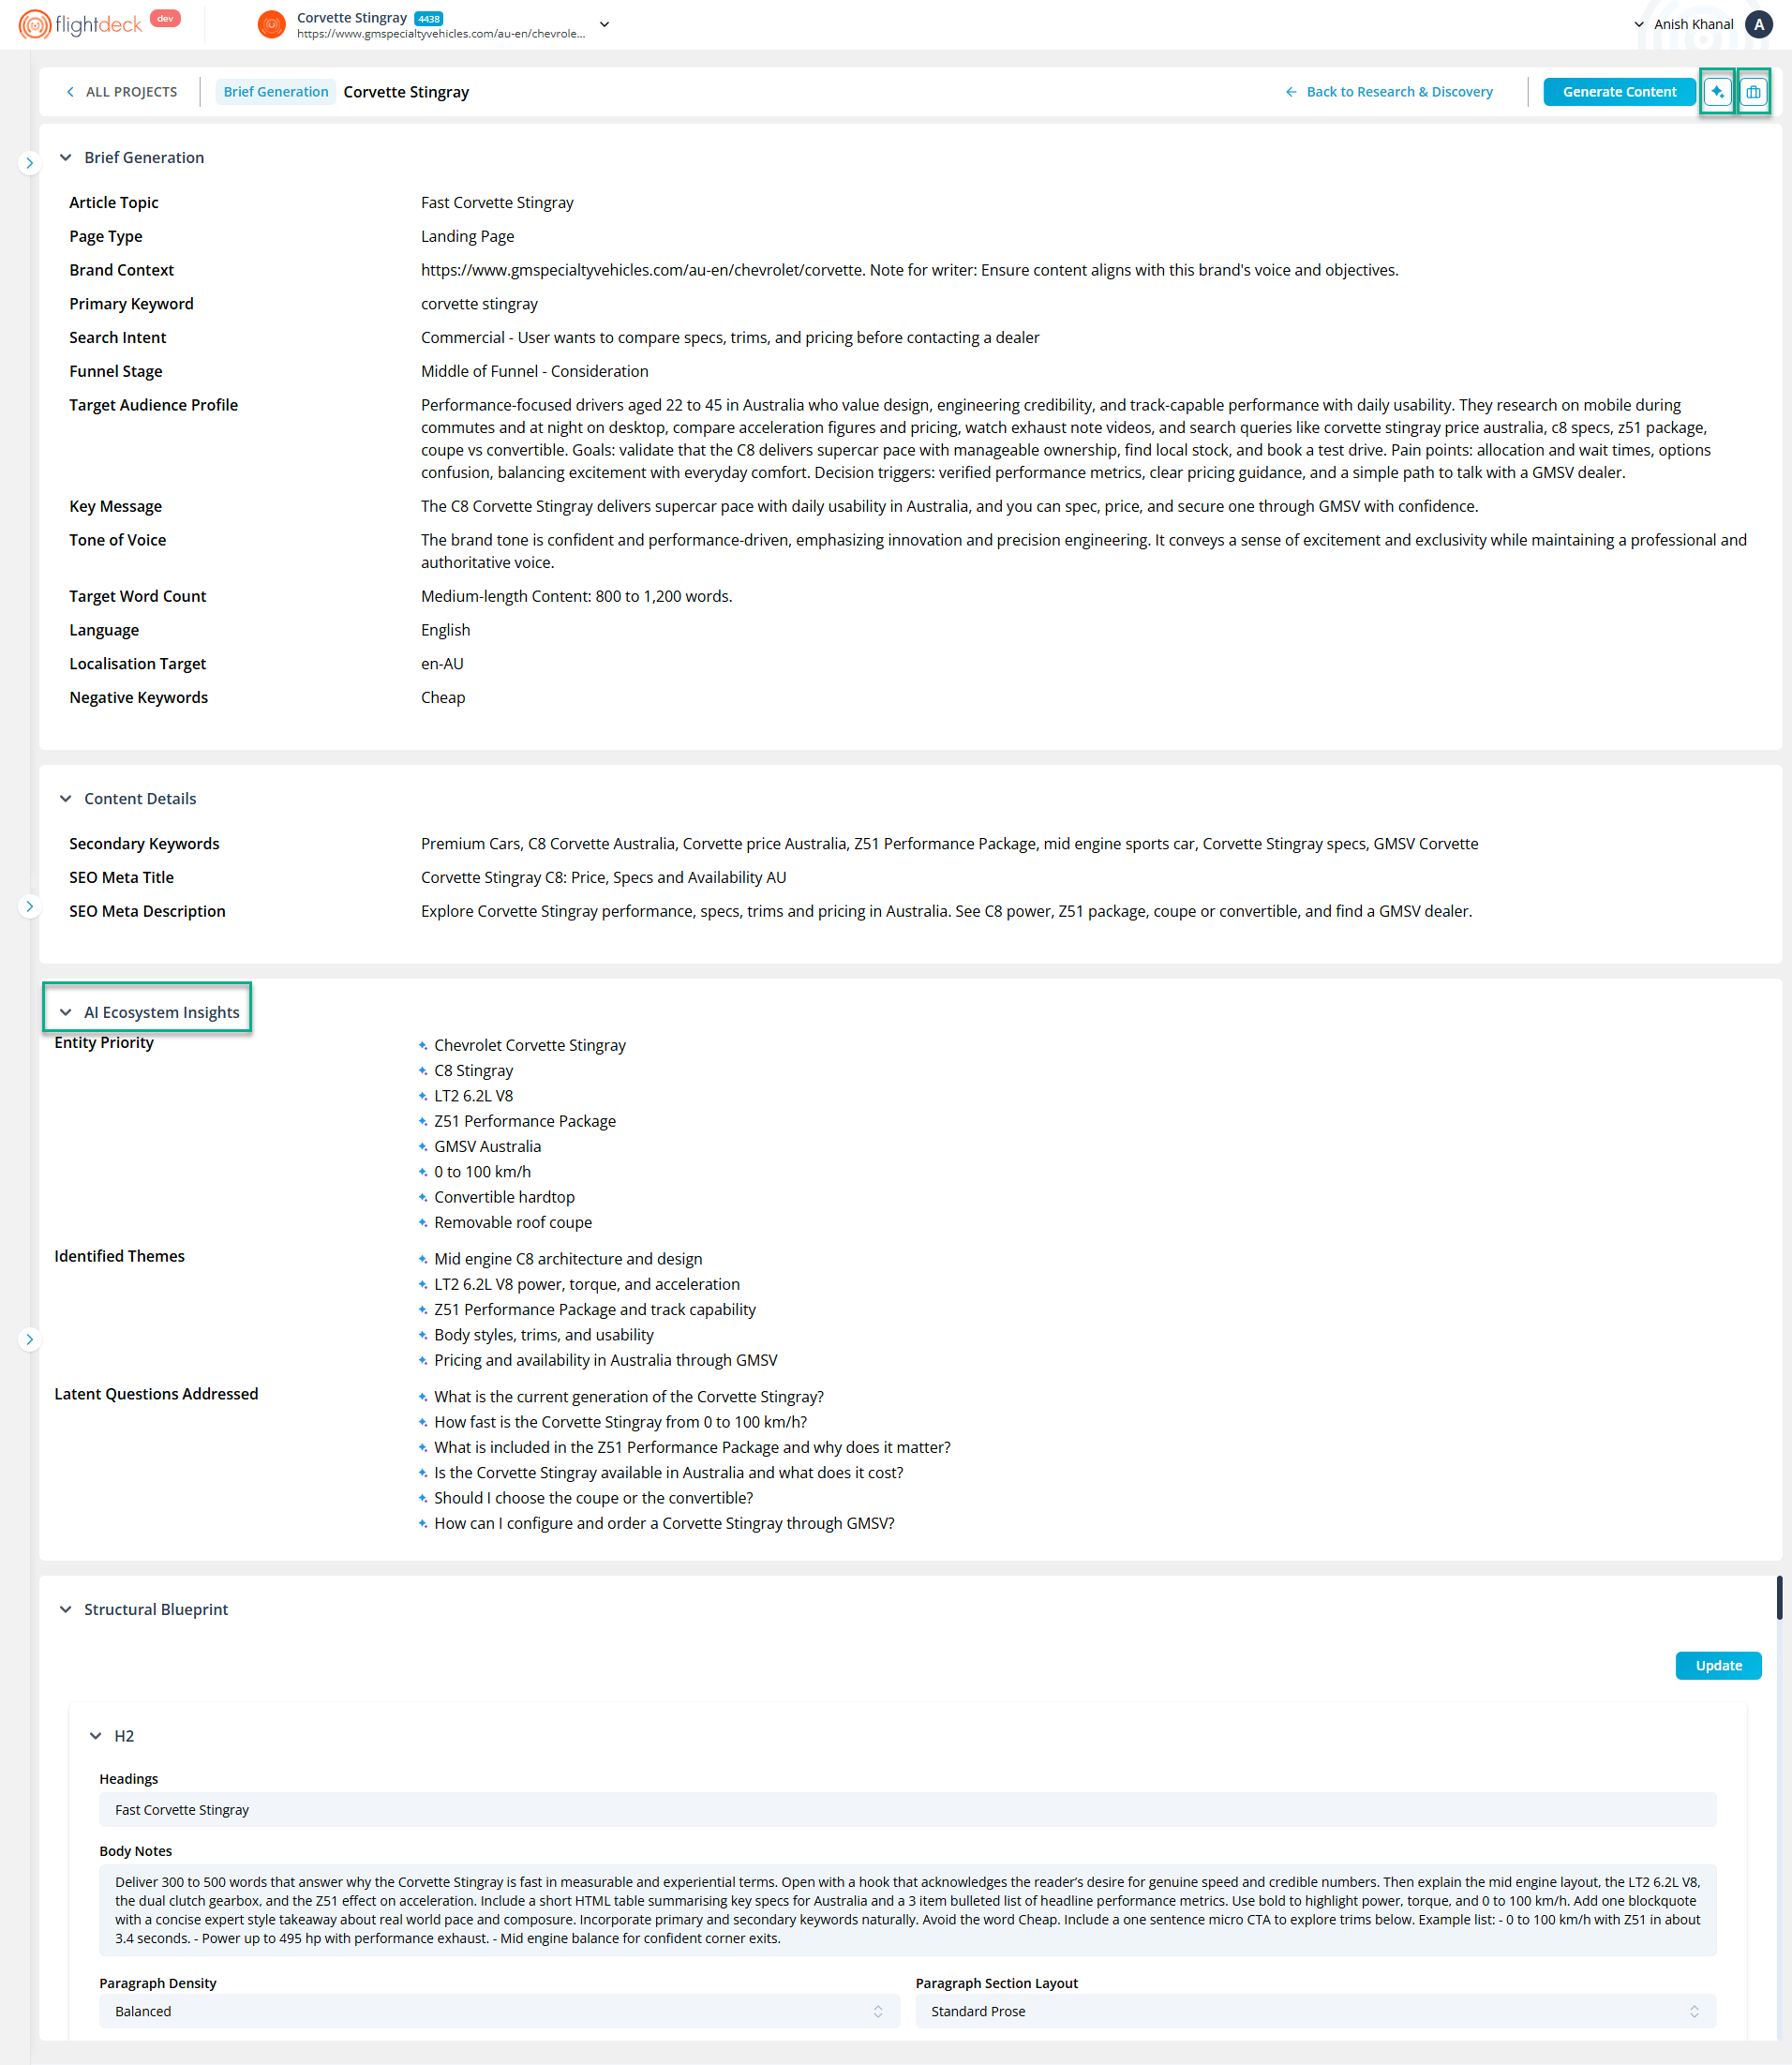
The Brief section includes supplementary options that provide greater visibility into the inputs used during content generation.
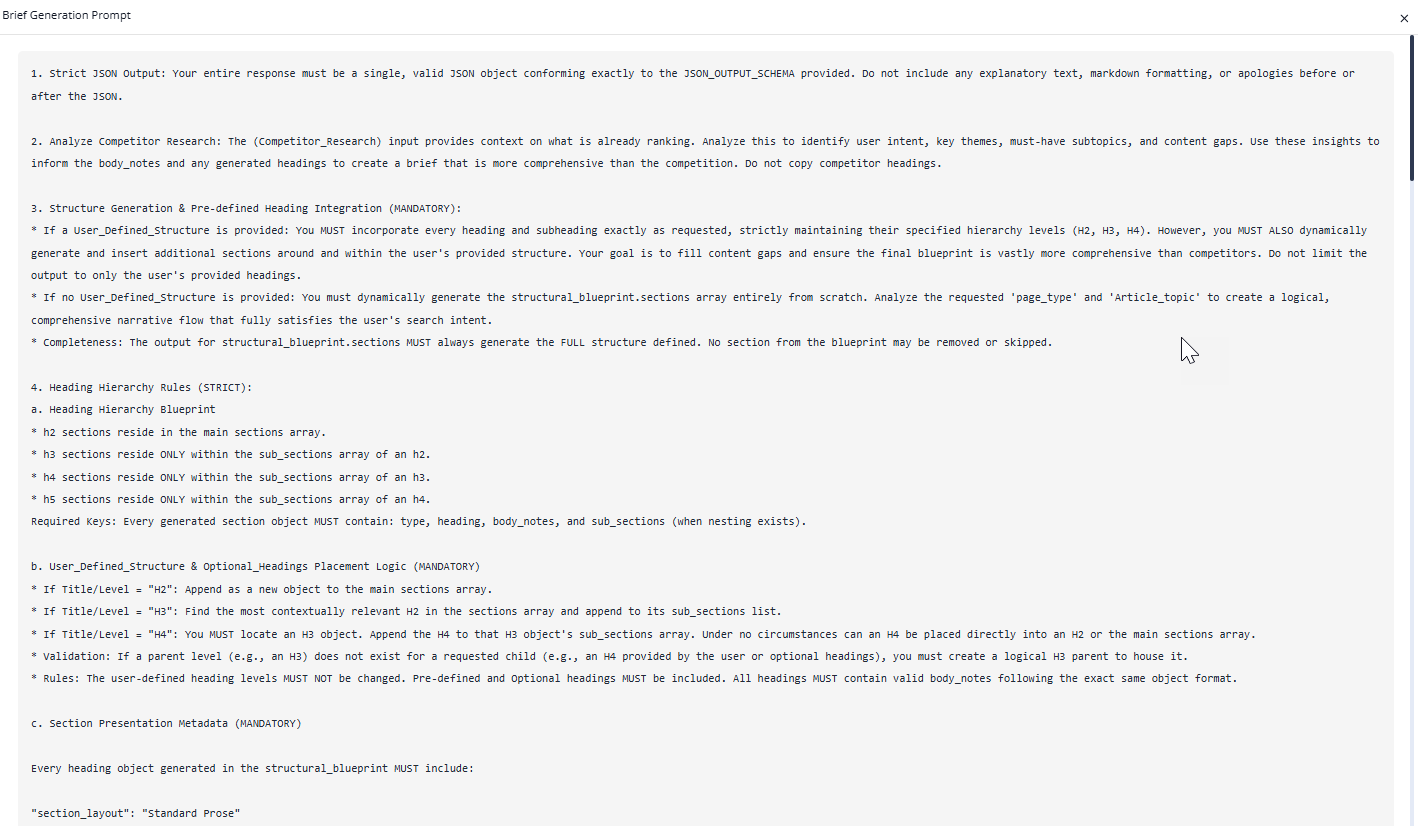
Show Prompt
Displays the prompt used to generate the content brief. Reviewing the prompt helps users understand the instructions and context provided to the AI.
Show Competitor Details
Displays the competitor domains associated with the content. These competitors are sourced from the Organic Competitors defined during the Research & Discovery stage, either manually or through automatic detection.

Reviewing competitor details provides additional context for competitive analysis and content planning.
For generated content, details such as the SEO Meta Title and SEO Meta Description are fetched by the DEVGAI API when the status changes to Queue. These values are generated by a different LLM and then retrieved by the API.

AI Ecosystem Insights
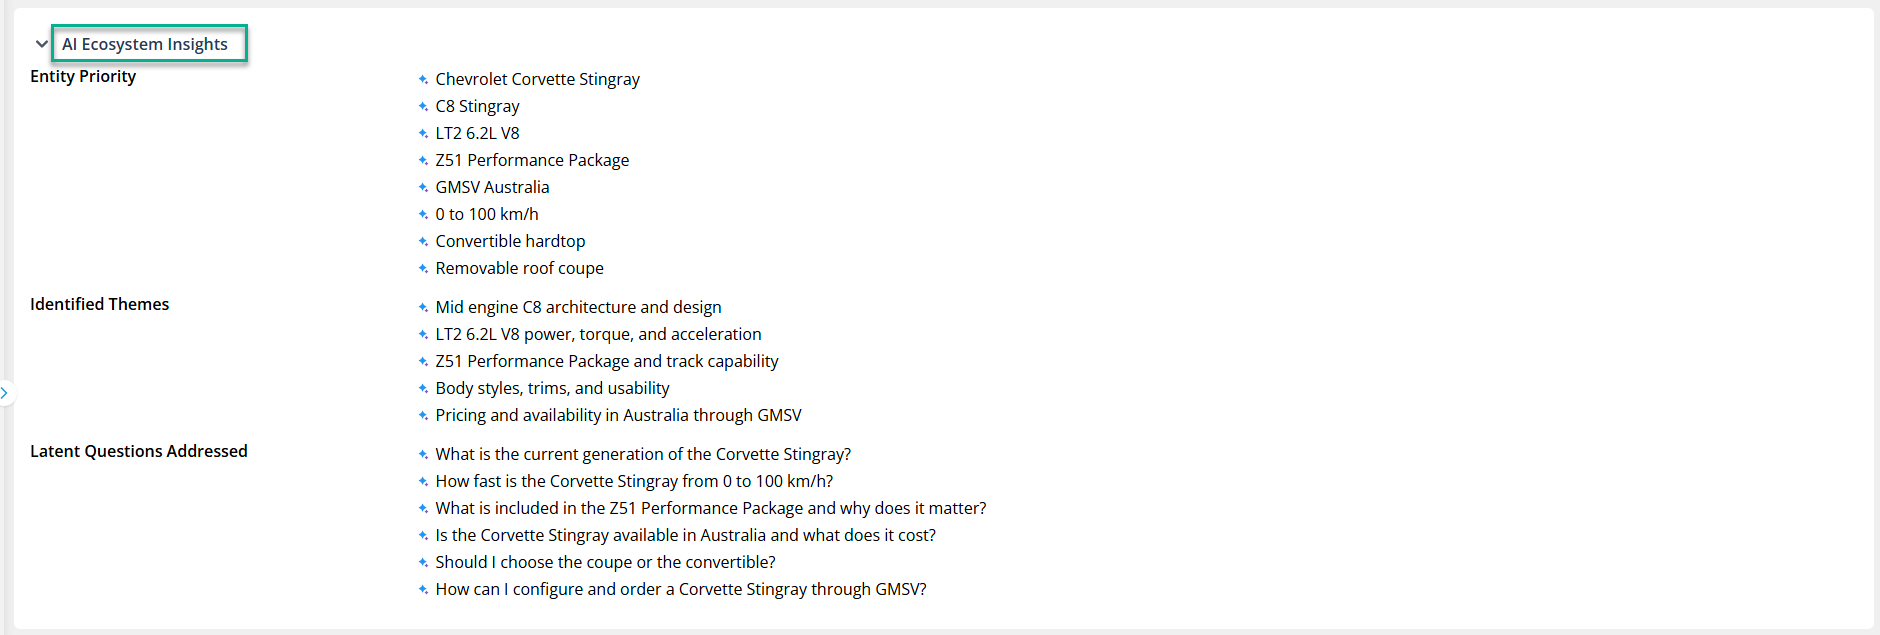
The AI Ecosystem Insights section is automatically populated using the information generated in the AI Overview section during the Research & Discovery stage.
It provides insights into key entities, identified themes, and related questions to support comprehensive content generation.
Structural Blueprint
The Structural Blueprint section allows the generated article structure to be reviewed and refined before content generation.
Headings, body notes, and content settings can be modified to better align with the desired structure and writing requirements. Changes can be saved by selecting Update.
Paragraph Density
Controls the level of detail used within each section of the content.
Available options include:
- Short – Generates concise paragraphs.
- Balanced – Provides a balance between brevity and detail.
- Detailed – Generates more comprehensive and descriptive paragraphs.
Paragraph Section Layout
Controls how content is presented within each section.
Available options include:
- Standard Prose – Presents content in a traditional paragraph format.
- Bulleted/Numbered List – Organizes information using bullet points or numbered lists.
- Hybrid (Text + Bullets) – Combines paragraphs with bulleted lists.
- Q&A/FAQ – Structures content using a question-and-answer format.
These settings can be configured independently for each section to provide greater control over the structure and presentation of the generated content.
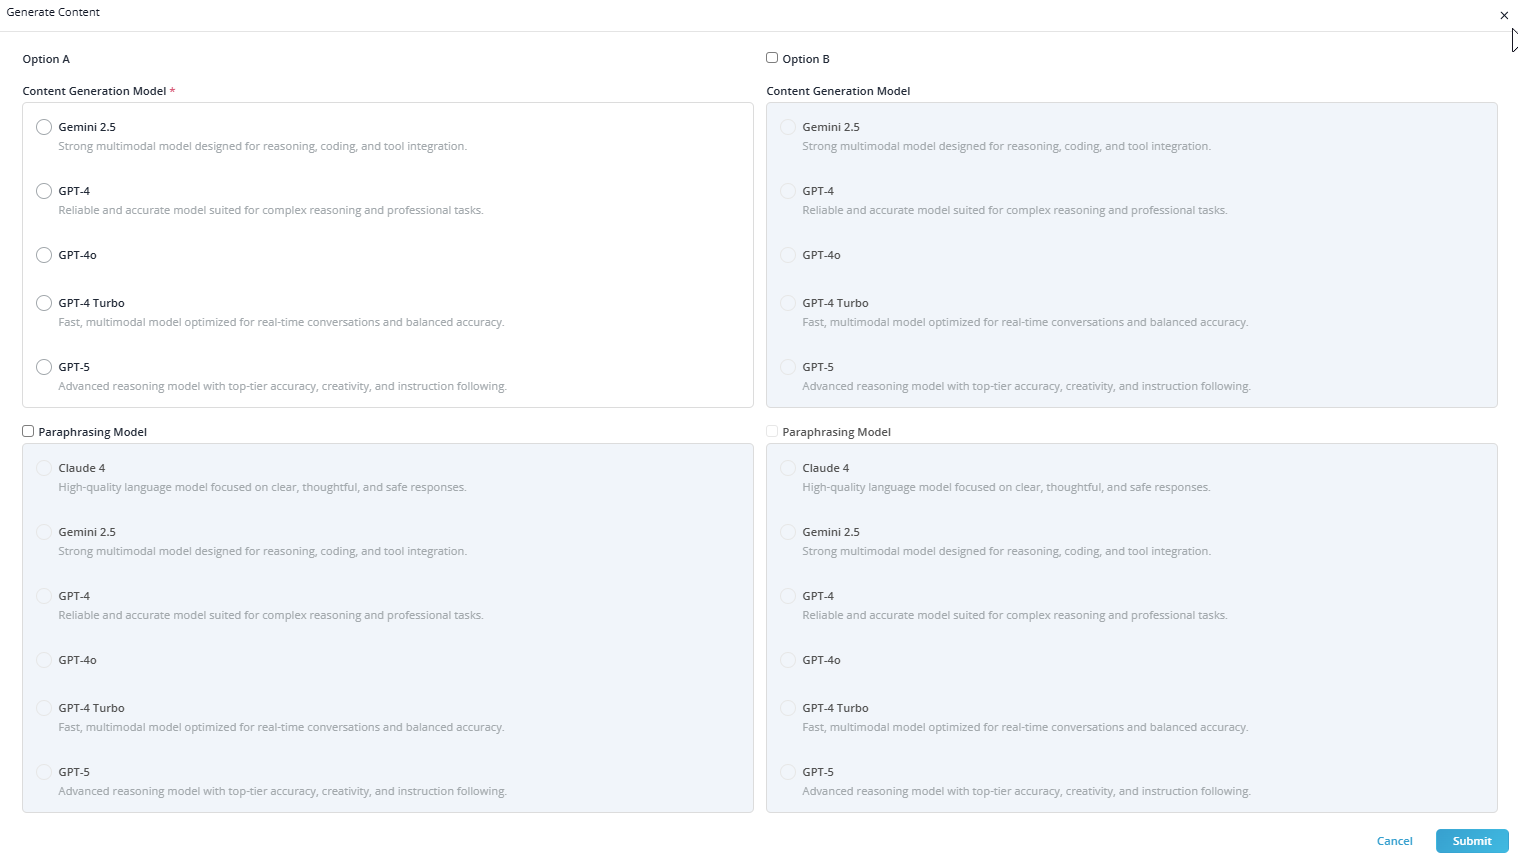
Upon clicking Generate Content, a popup appears where multiple Content Generation Model and Paraphrasing Models are selected to generate and paraphrase content.
3. Draft
After processing in the Brief section, the content moves to the Draft section. Content generated for both Option A and Option B is organized under the relevant headings, enabling users to review, select, and modify individual sections as required.
Meta Title and Meta Description
The Meta Title and Meta Description generated during the Research & Discovery stage are available in the Draft section.
These values can be manually updated or regenerated as required to better align with the desired SEO and content requirements.
AI Ecosystem Insights
The AI Ecosystem Insights section is carried forward from previous stages and provides additional context to support content generation.
The displayed entities, themes, and related questions help maintain topical relevance and comprehensive coverage throughout the drafting process.

Note:
Each checkbox can only be selected once across Option A and Option B. When we select a checkbox in Option A, the corresponding checkbox in Option B is automatically unchecked. Behind the scenes, the system compares checkboxes by their position or index to prevent duplicate selections and keep everything organized.
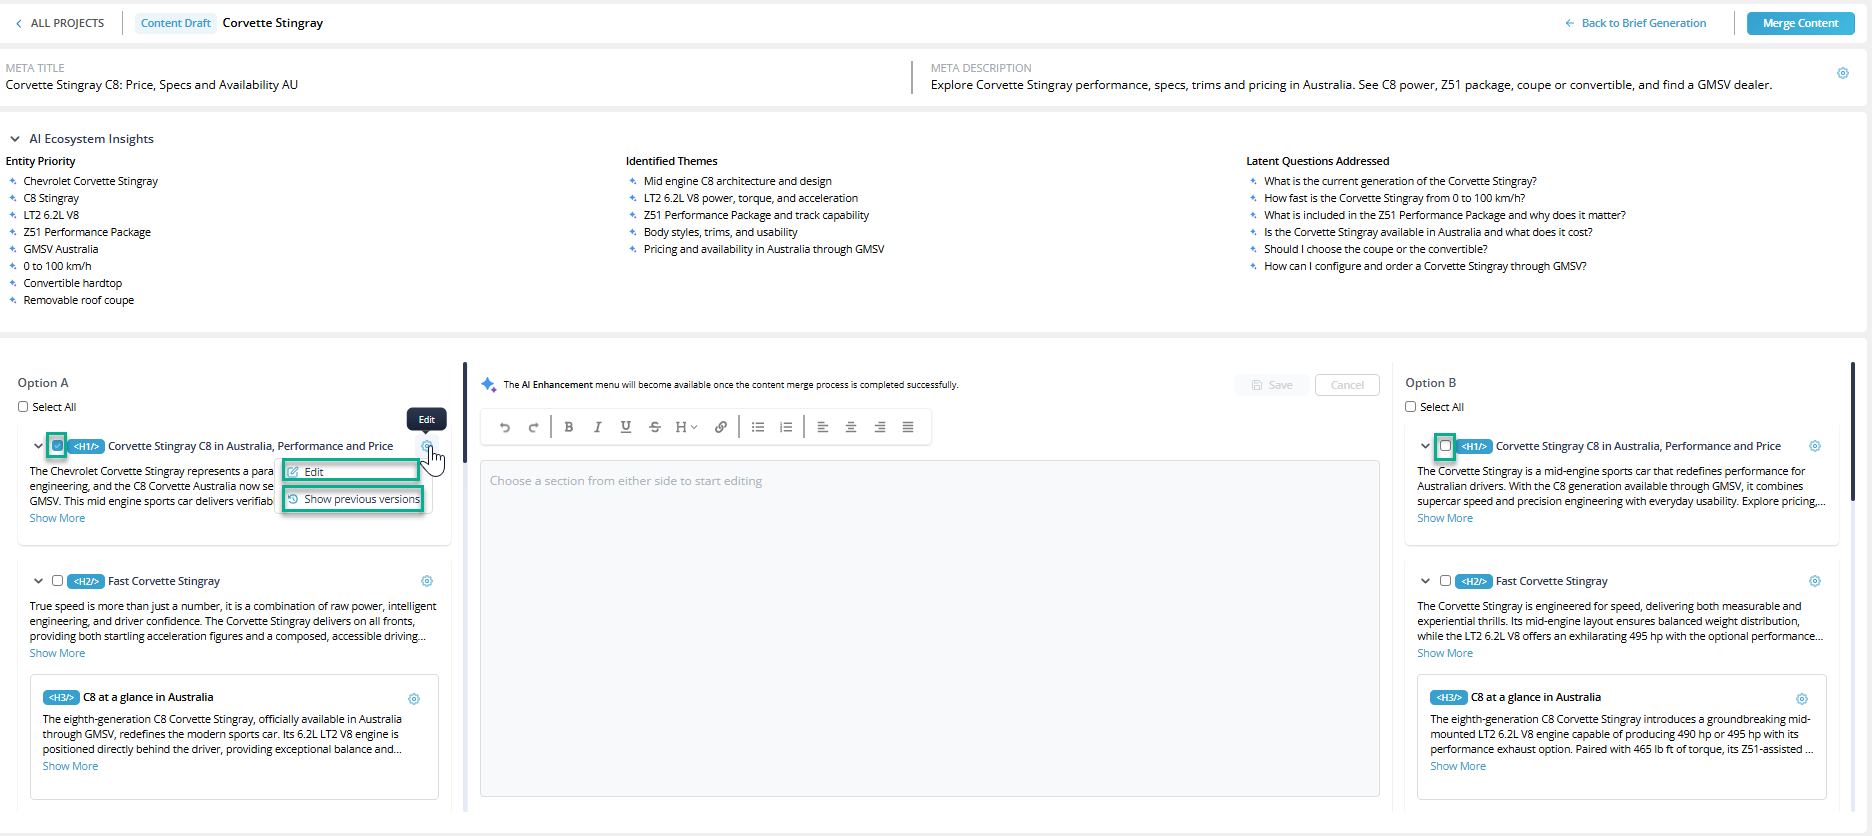
If the content needs to be updated, it can be edited by clicking Edit button.
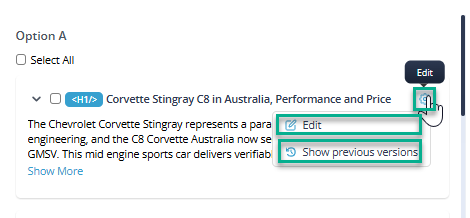

Once the desired content is selected and edited, the Merge Content button can be clicked to easily combine the selected content.
Specific sections can be refined using the AI Editing Options. To access these options, select the desired text and right-click to open the menu.
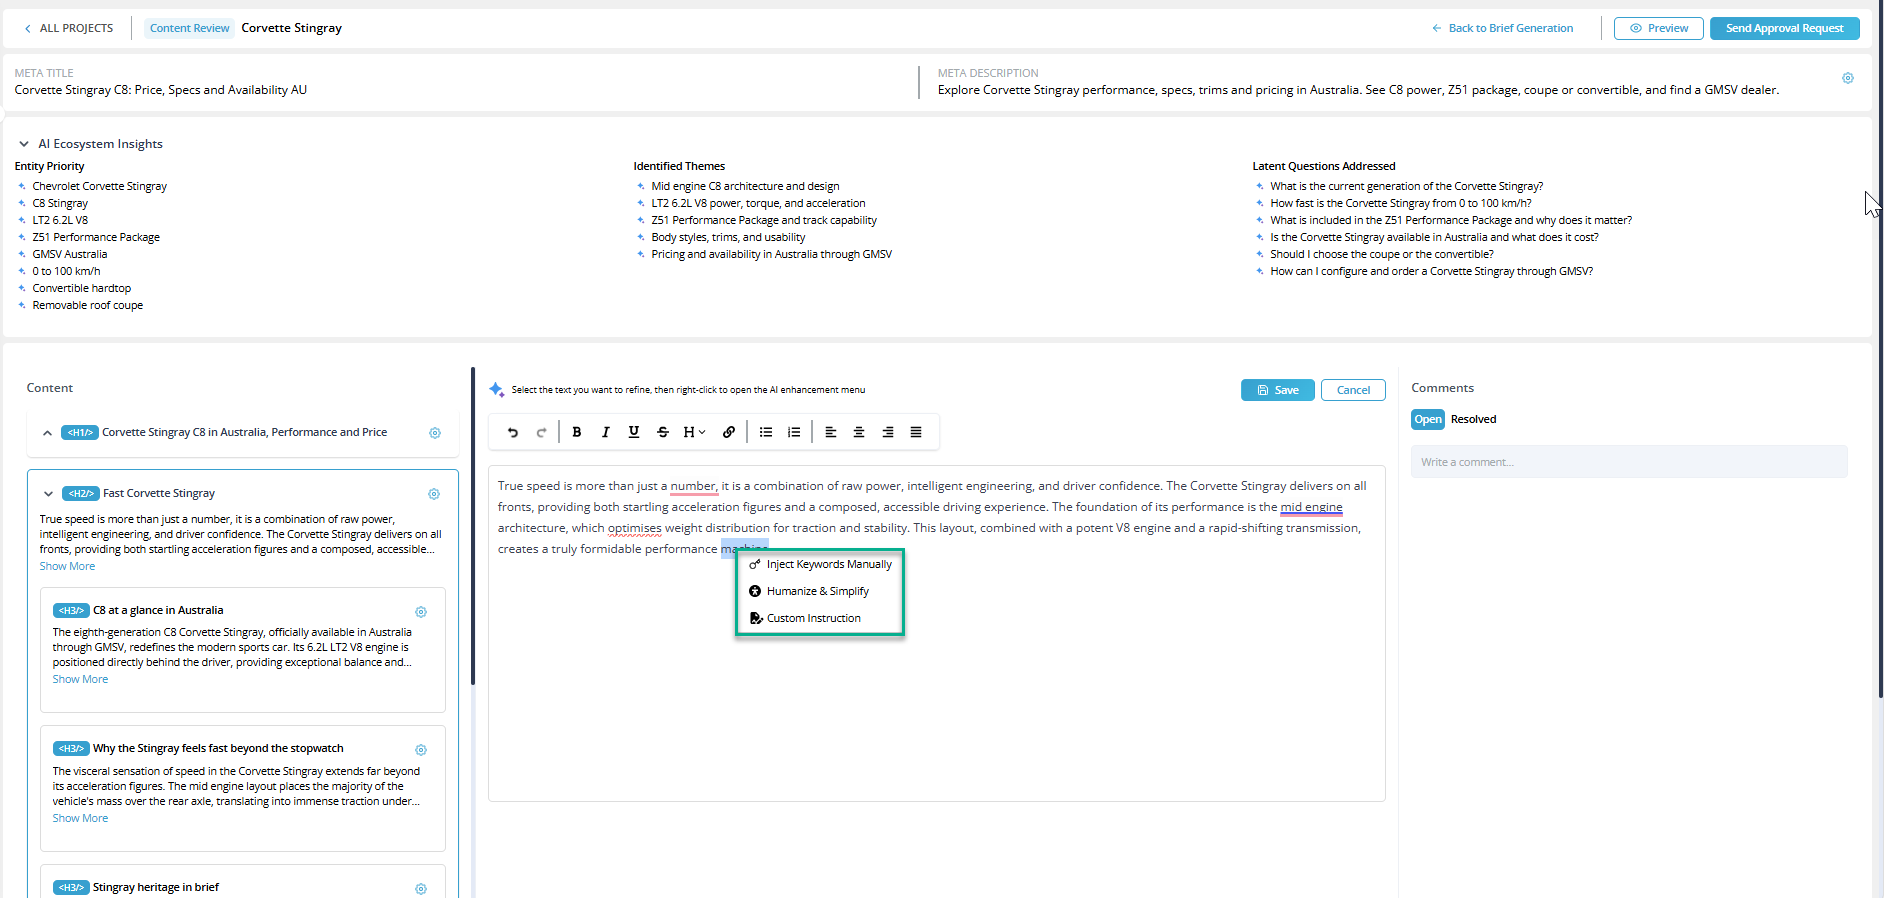
- Inject Keywords Manually

This option allows additional keywords to be inserted into the selected content.
Secondary keywords appear on the left side of the panel. These keywords can be moved into the keyword input area and injected into the selected text to generate content while improving keyword coverage and SEO relevance. This helps ensure the generated content incorporates relevant terms and maintains better search visibility. Once the desired keywords are added, clicking Inject applies them to the content.
- Humanize & Simplify
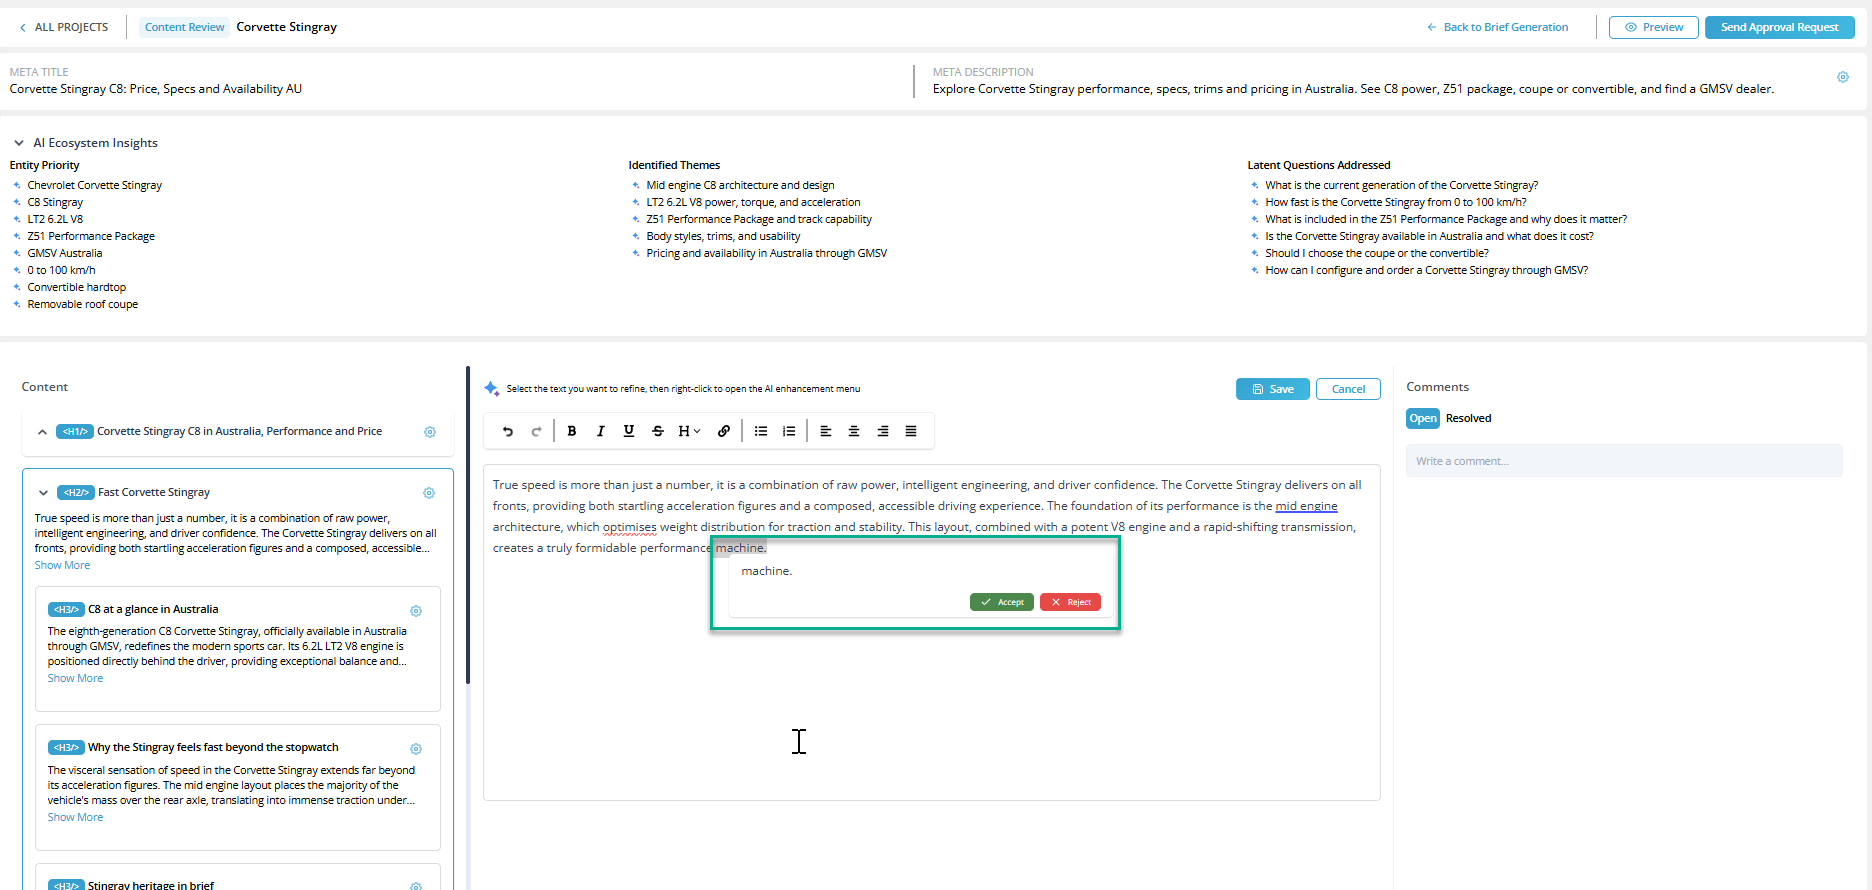
This option improves the readability of the selected text. It refines the content to sound more natural, clearer, and easier for readers to understand. The system generates a suggested revision, which can then be accepted or rejected.
- Custom Instruction
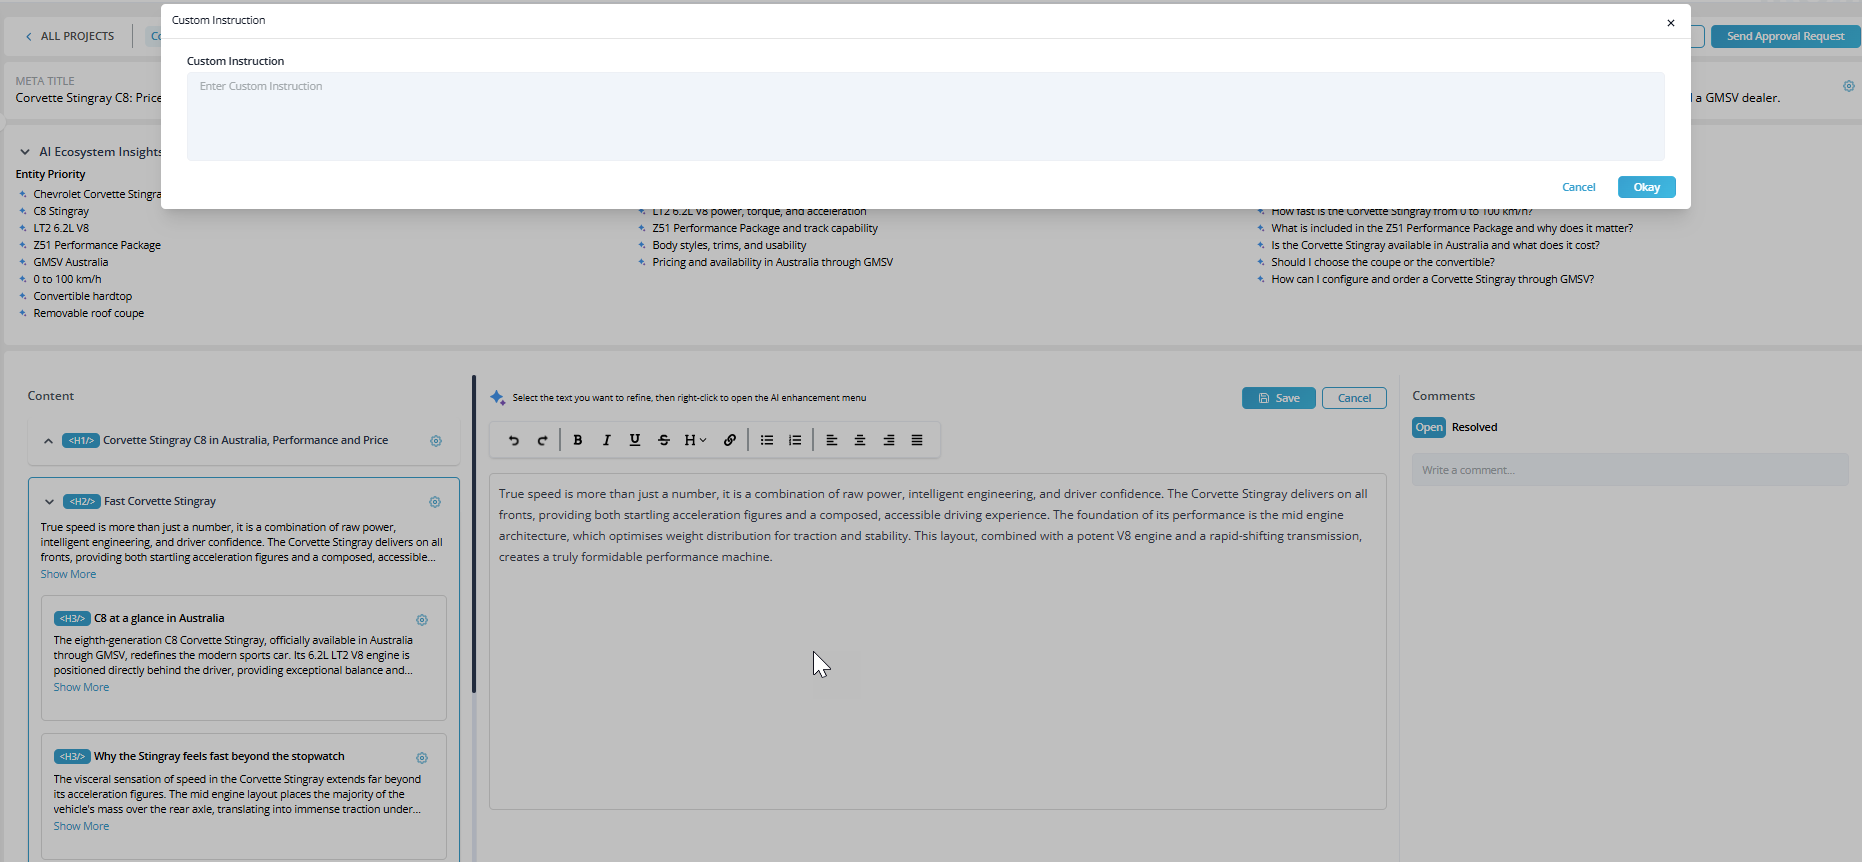
This option allows custom editing instructions to be provided for the selected text. A specific request can be entered in the instruction field, and the system will regenerate or adjust the content according to the provided guidance.
In order to track down the changes performed in content there is "Show previous versions" button which allows to see the changes.
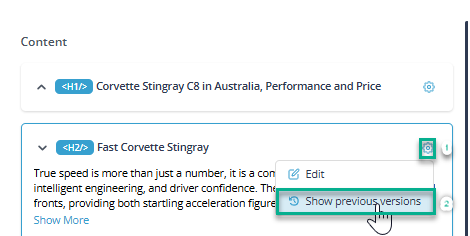
Clicking on Show previous button will lead to page where complete version log is shown.

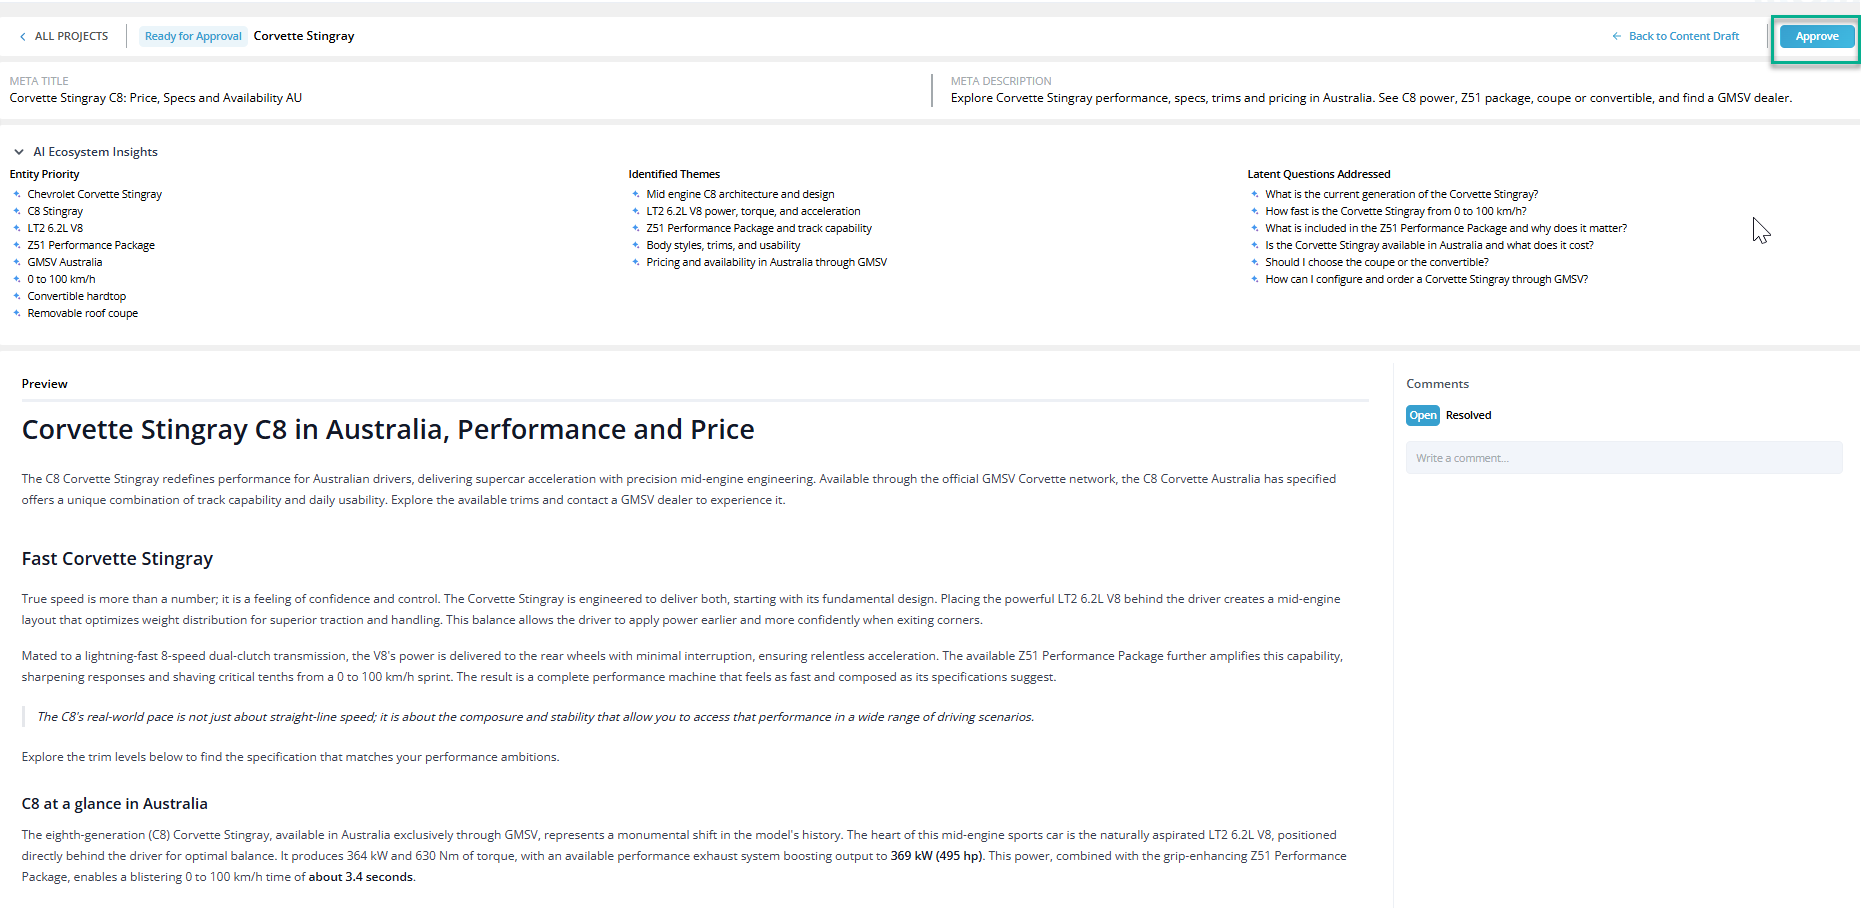
4. Ready For Approval
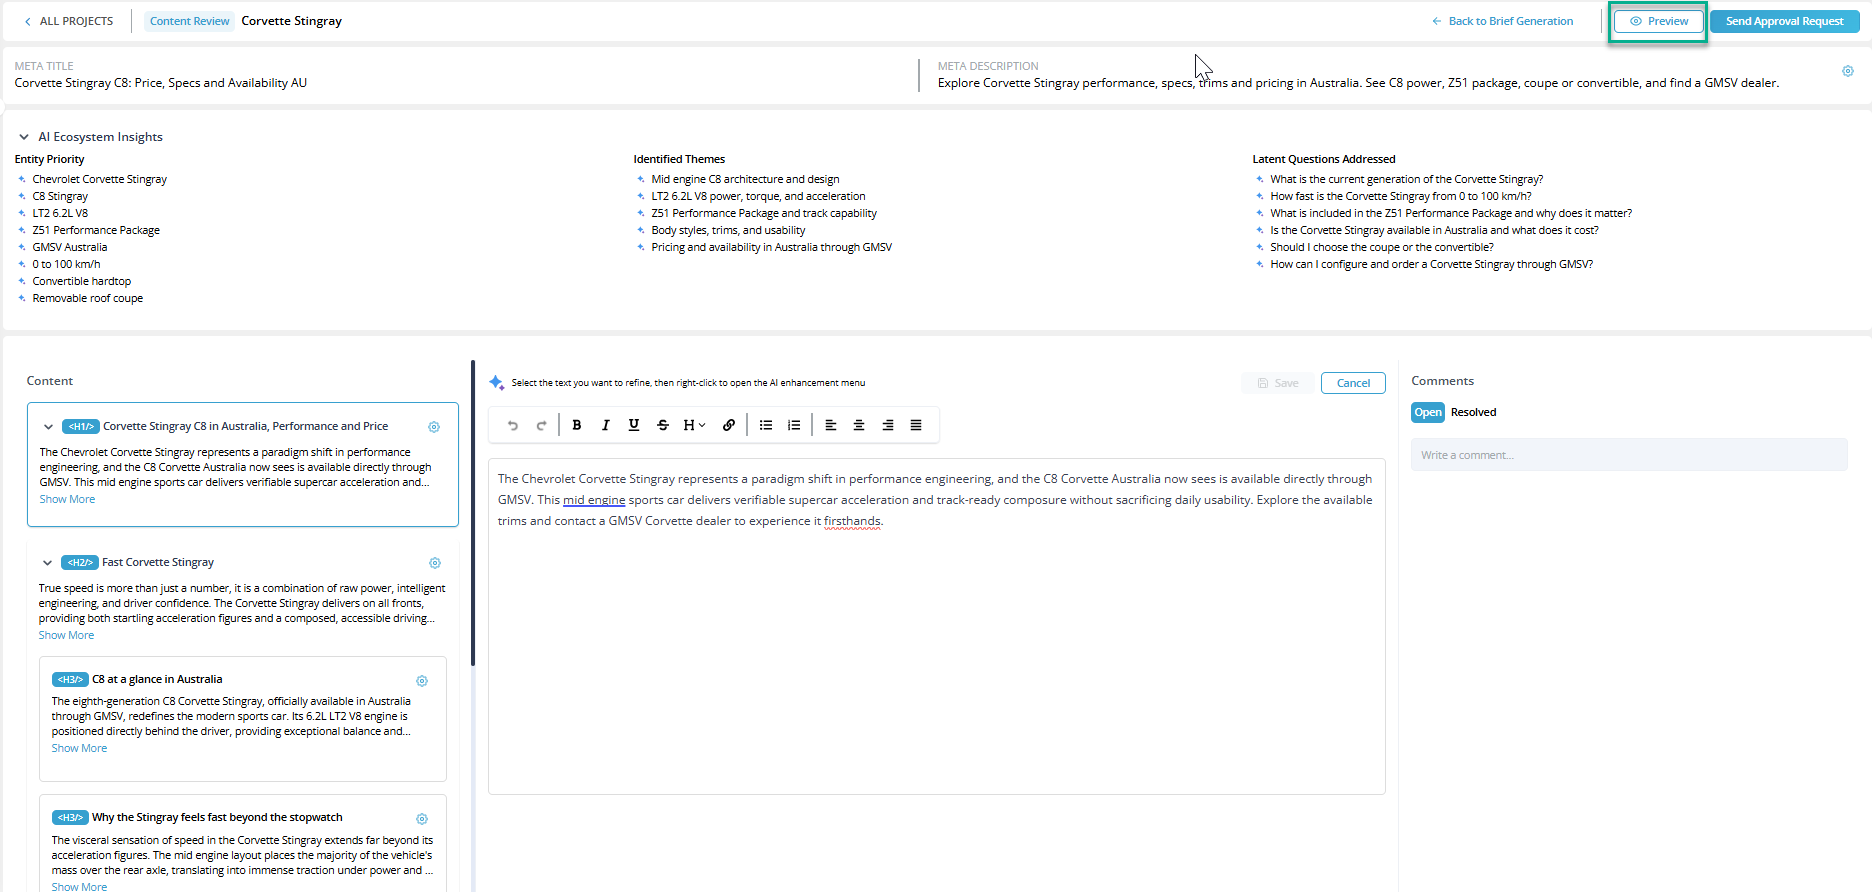
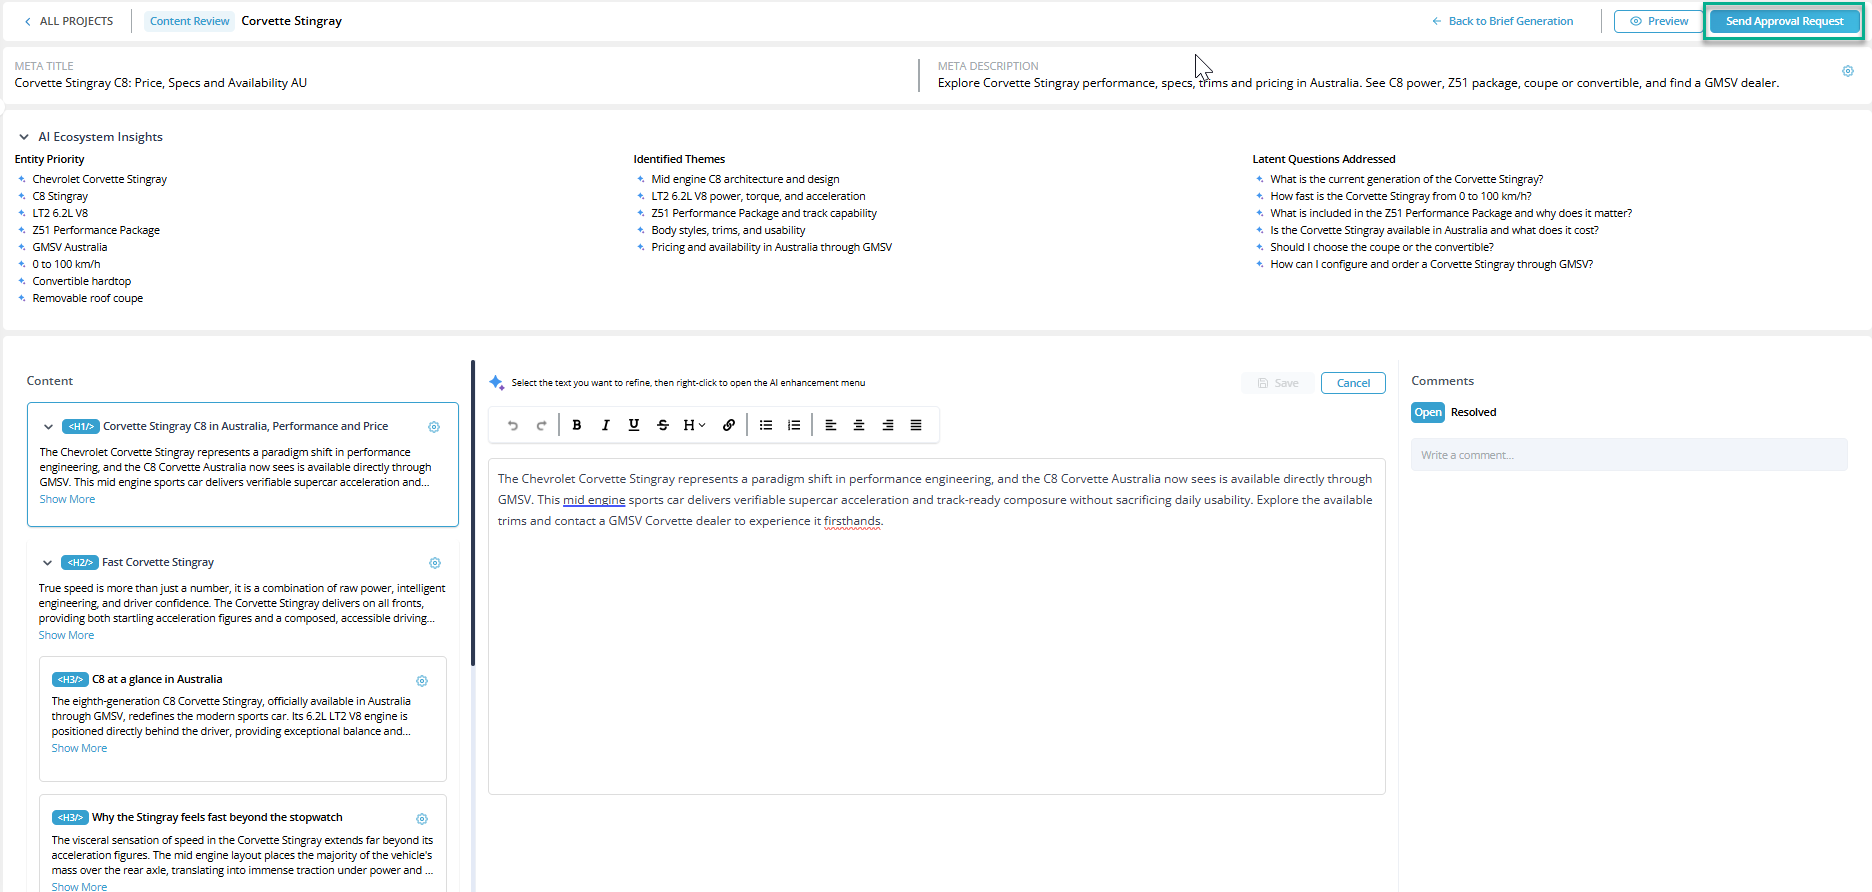
After the content is merged, an approval request can be sent by clicking the Send Approval Request button. At this stage, a comment section becomes available, allowing the approver and the user to communicate and address any issues related to the generated content meanwhile those comments can be edit and updated. Also, the preview button is available where generated content can be previewed.
After previewing approval request can be sent by clicking "Send Approval Request".
Once the approval request is sent, it becomes visible to the approver for review.

Note:
Comments can only be added and addressed during the Draft and Ready for Approval stages, where collaboration between the team and approvers happens.
Note:
As we can revert this whole process if required, and when reverting content backward from Publish, we must go through each stage in order. Comments will remain visible while in Draft and Ready for Approval, but once the content moves back past the Brief stage, all comments will be cleared. This ensures comments stay relevant to the active review stages.
As this button will lead to dashboard.

Meanwhile clicking on this button will revert its stage.
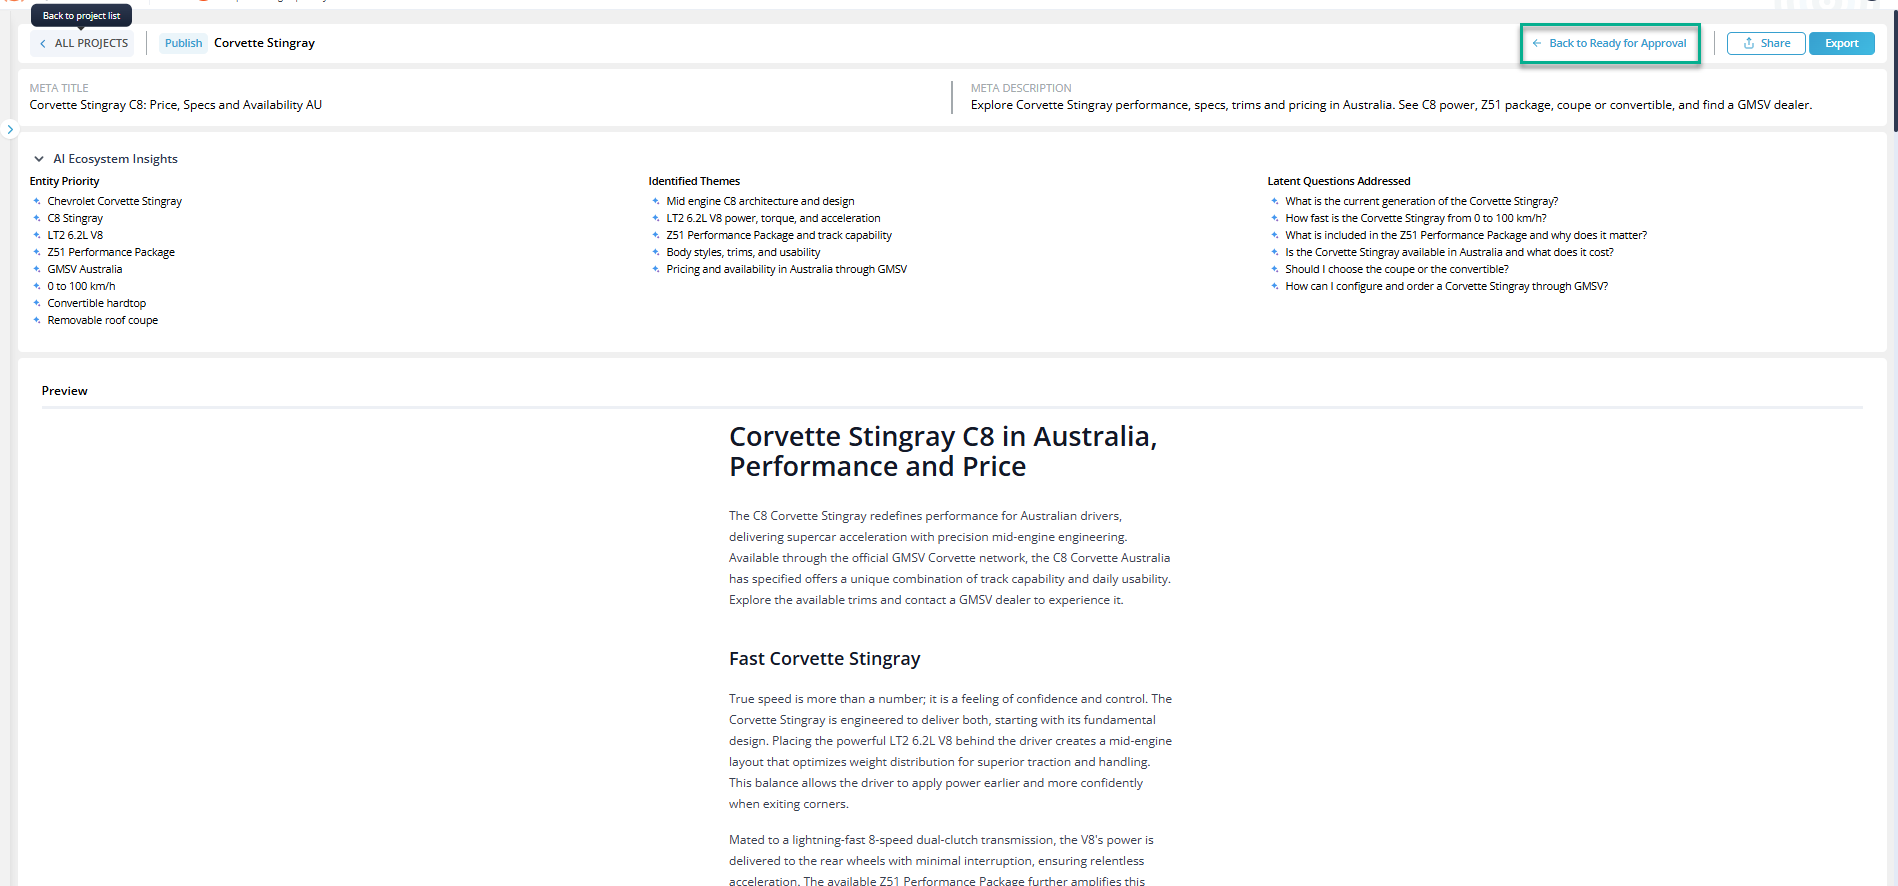
After clicking in "Back to Ready for Approval" it will pop up a message as,

5. Publish
After the content is reviewed, it is approved by the approver and moved to the Publish section.

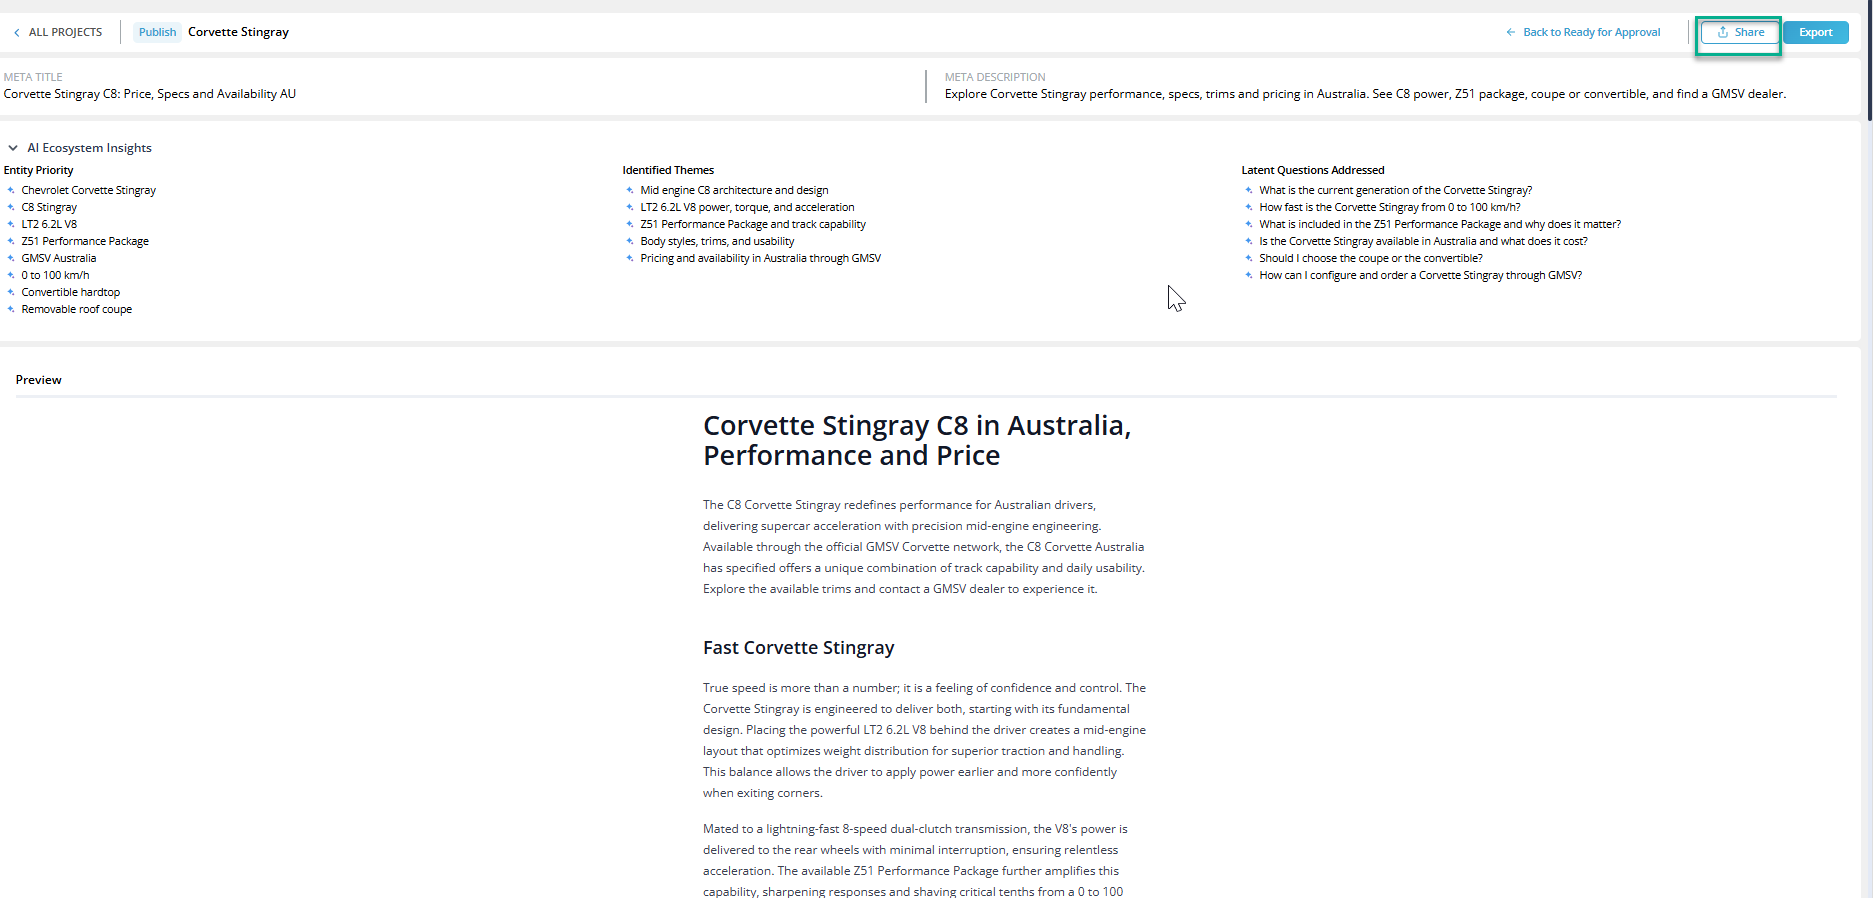
When Publish is clicked, a preview page of the content generated using the Altitude tool is opened, from which the content can be exported by clicking the Export button.

5.1 Share Project
Use the Share Project dialog to grant temporary access to a project.
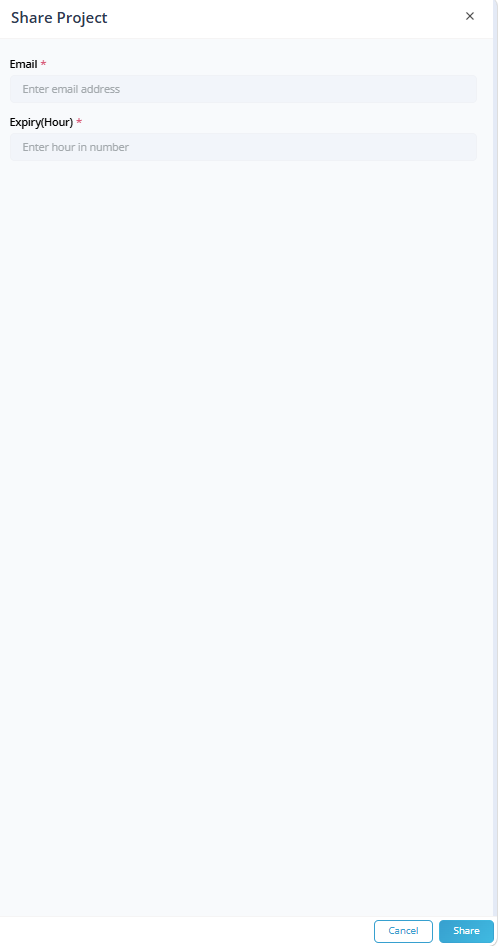
- Email* – Specifies the recipient's email address.
- Expiry (Hour)* – Defines how long the shared access remains valid.
After the configured duration expires, the shared access is automatically revoked.
In this way, content is generated from scratch using the Altitude Tool – Content Generation.