
Client Settings - Create/Edit Client
Creating a New Client
In Flightdeck, client accounts is associated with profile. A profile may contain more than one clients whereas, one client cannot be associated to multiple clients.
A. Creating a New Client into a New Profile
Steps to follow:
| 1. Click on client information button on top-left of screen. |  |
| 2. Staying at All click on "Add New Client" button | 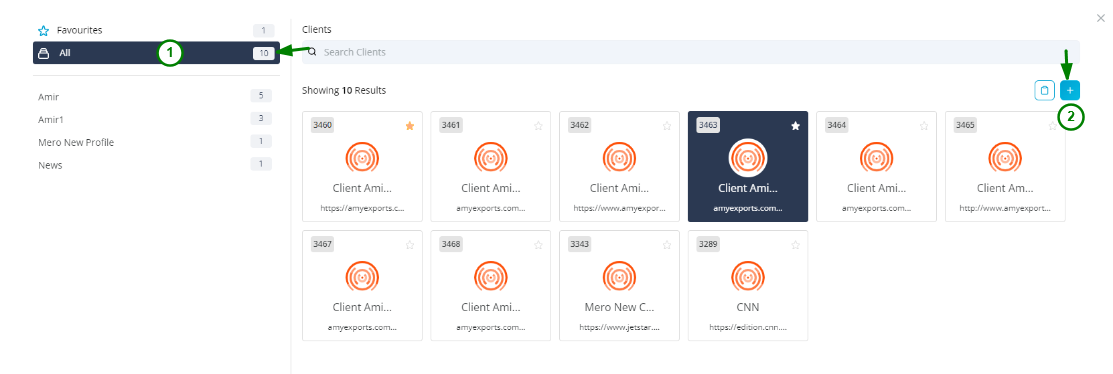 |
| 3. Click on Profile Name drop-down | 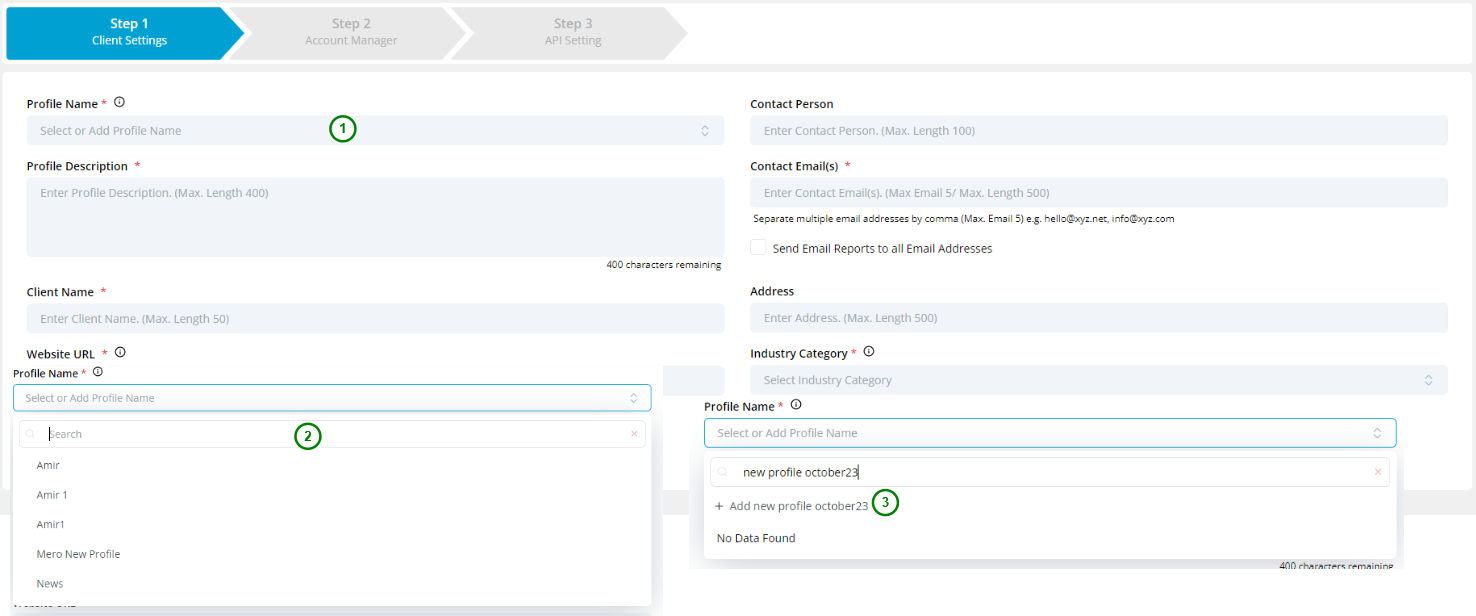 |
| 4. Type the new profile name in Search area and lick on + Add <new_profile_name> to add new profile. (The new profile is not created until the client configuration is complete.) | |
5. Fill all the required details.
| 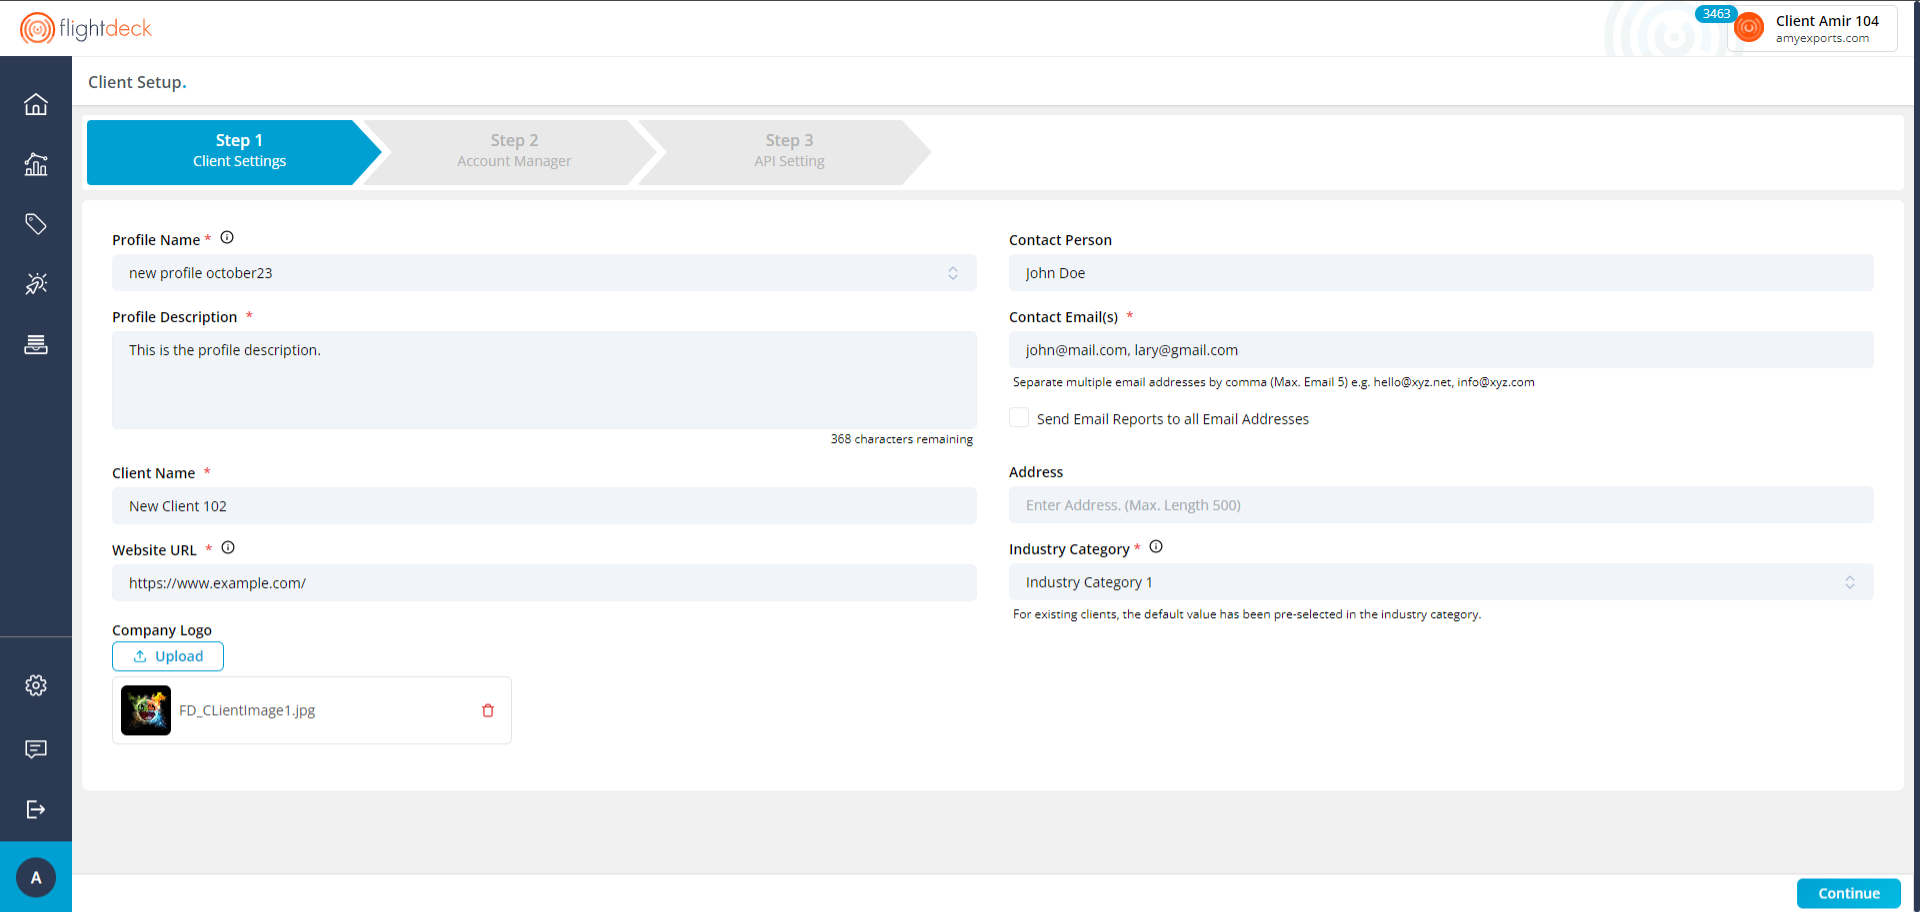  |
| 6. Click on Continue button. |
The new client in the new profile is created.
Creation of new profile / new client might be rejected; if the role constraint for number of Profile / no of client is exceeded to the user.
B. Creating a New Client into a Existing Profile
Everything is similar as creating client in a new profile.
| 1. In the client selection modal pop-up, Select the Profile from side bar and Click on Add new client button. | 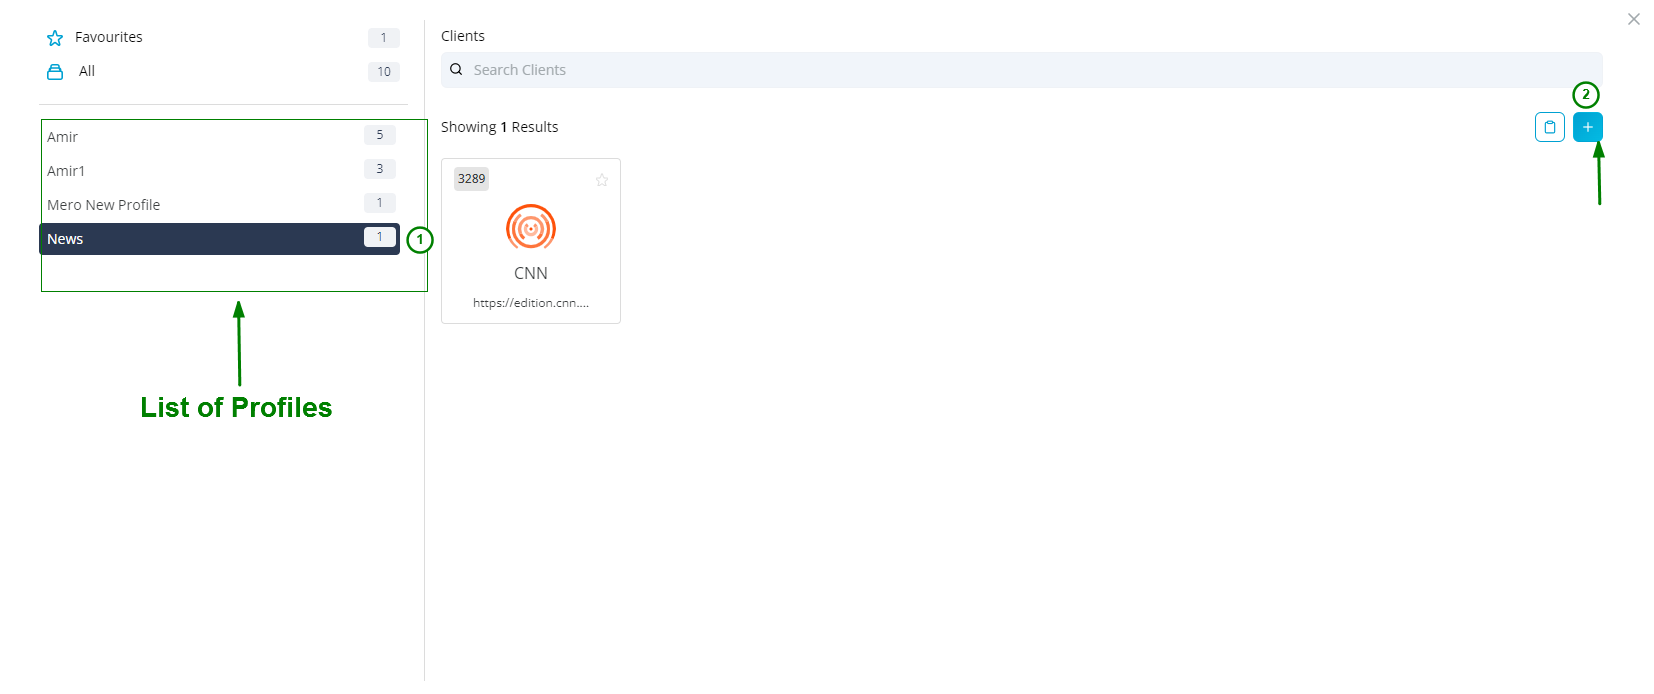 |
| 2. Also, you can change into existing profile (or, new profile) from the drop-down to select the Profile Name. | 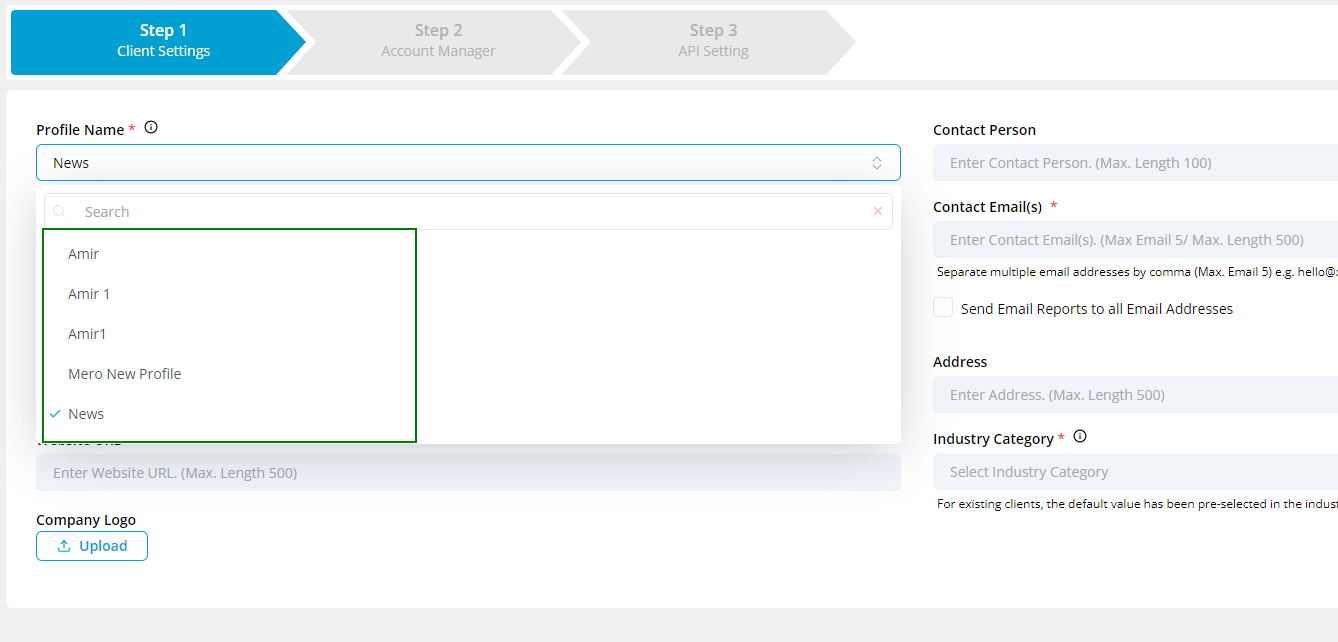 |
3. Fill in the required details.
| |
| 4. Click on Continue Button. | |
Clicking on Continue Button will Create Client and redirects to Account Manager (Step 2).
Editing Client Information
Client's Website URL cannot be altered.
Steps to follow:
| 1. In the side menu bar; Click on Settings menu. | 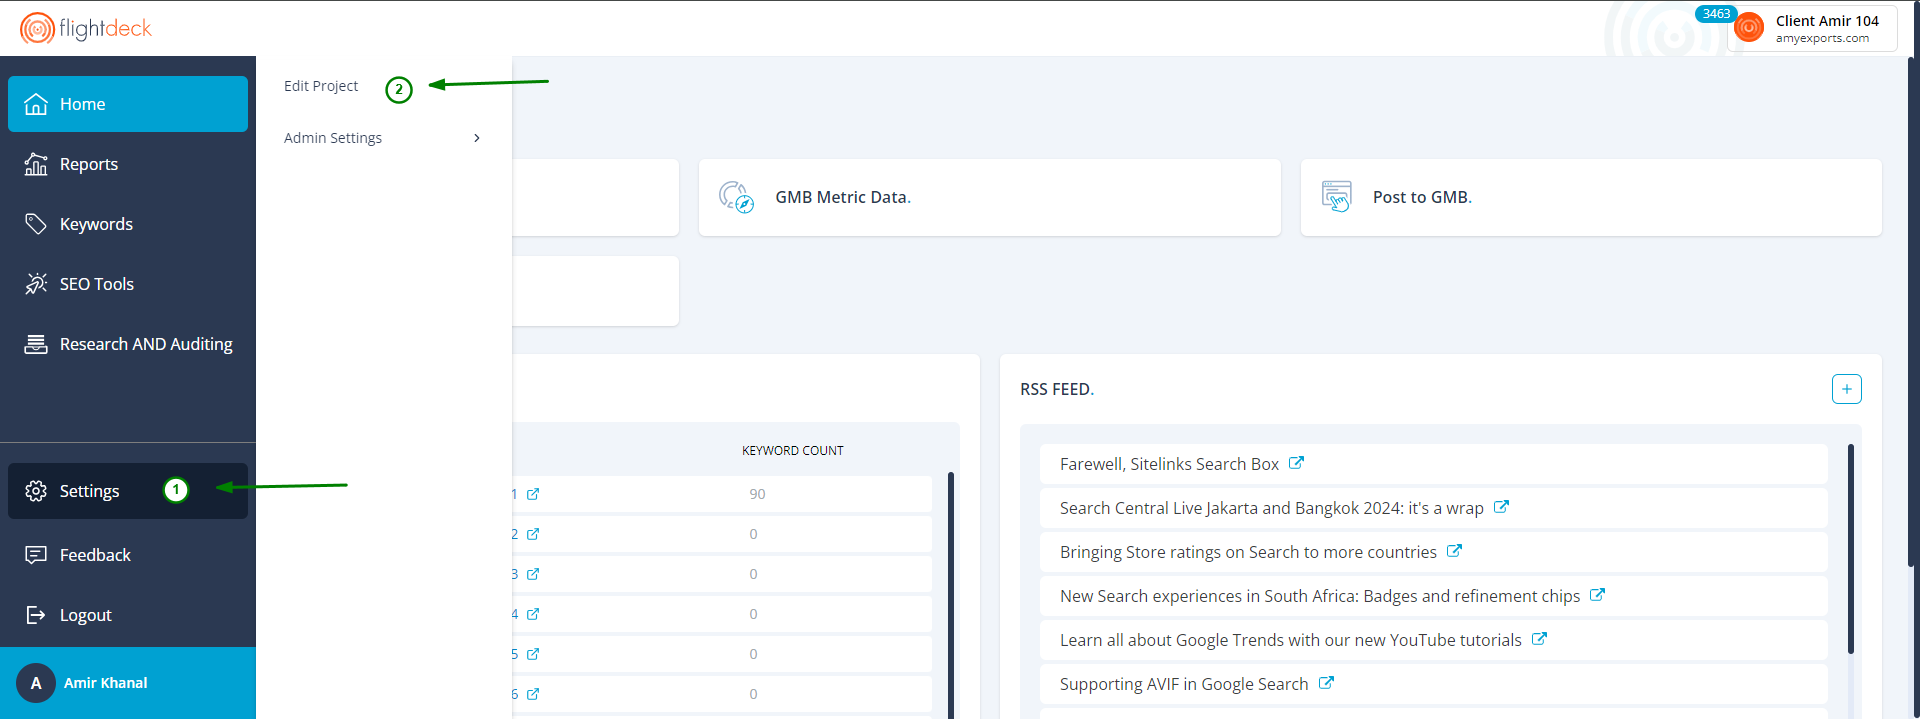 |
| 2. Click on Edit Project menu. | |
3. Make the required changes.
| 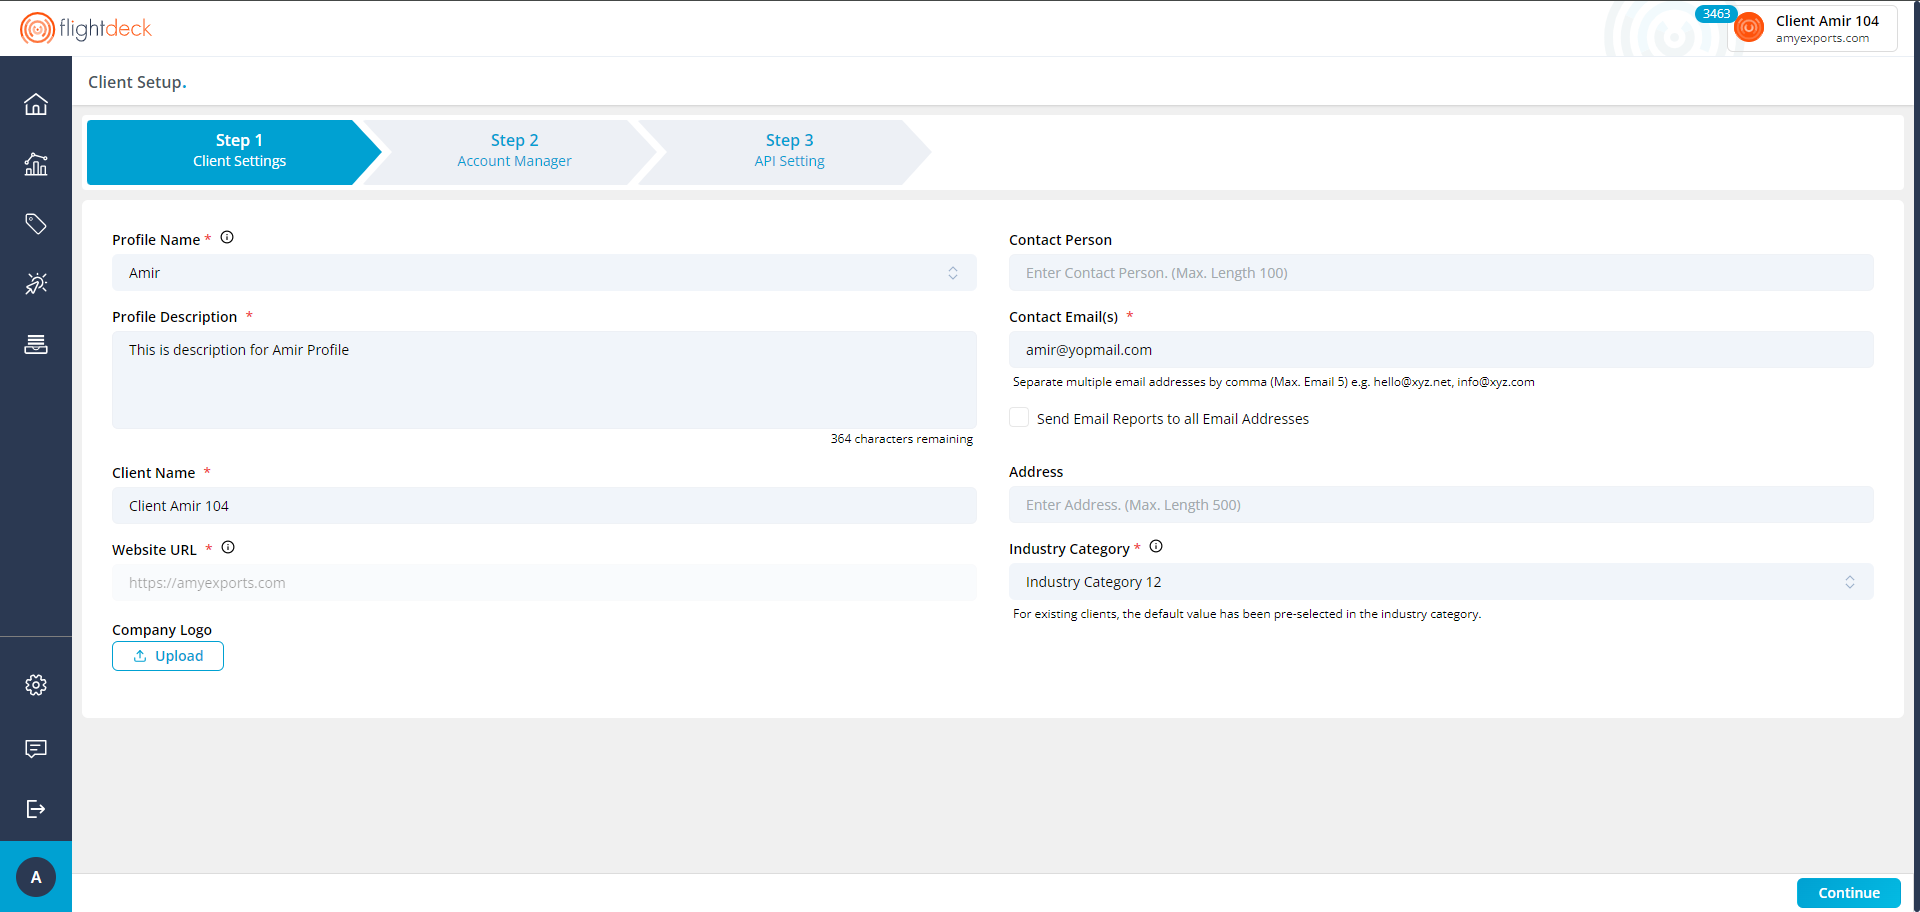 |
| 4. Click on Continue button. | |
Clicking on Continue Button will save edited Client information and redirects to Account Manager (Step 2).